Here’s a look at what’s been happening at Brewer’s Friend over the past month. Check out the latest and greatest recipes, styles, ingredients, and more.
Wine making calculators, not directly related to brewing beer. However there is some overlap between beer brewing and wine making. These calculators are useful in making grape wines as well as meads and fruit wines.
Five gallons? by Steve Ruch with 22 posts this month
Five gallon batches are considered the norm. What size does everyone actually brew?
First All-Grain (BIAB) Recipe – SMaSH Pale Ale by Brewer #430359 with 60 posts this month
As the title says, a friend and I are going to brew our first all-grain (BIAB) recipe in the next couple of weeks, and I was looking to get any feedback. We decided to go for a SMaSH beer, so we co…
Did I move to secondary too soon? by Msquared with 15 posts this month
[I]Our brewing group did a Belgian Quad at a commercial brewery. Everyone buys a carboy or 2 of wort does their own thing and brings it back around November to taste and compare. Beer had an og of …
“You know, what I really need is…” by Tim Bulin with 12 posts this month
Well what DO you :really” need? I’ll start…I really need to add ANOTHER pump and further overly complicate things in the interest of saving 10 minutes of work a month…
Hi all. Haven’t brewed in around 25 years and things have really changed. by Brewer #430125 with 10 posts this month
I used to brew a lot back when. The county I live in and the surrounding ones were dry counties until a few years ago and the nearest adult beverages could only be found an hour and a half away at …
My Red Ale by PaiboonL with 8 posts this month
This is my 3rd time brewed Irish Red Ale in Bangkok. It has biscuit flavors.
Top Off/Dilution Water pH? by mikezepponi@gmail.com with 10 posts this month
I have a 7.5 gallon Anvil Kettle, and I’d like to try a BIAB in it. In order to get the volume I want for my fermenter I’ll need to add a about half a gallon of water to roughly 5.5 gallons of wor…
Major #$@& up!! by Vallka with 12 posts this month
Ok bet you havn’t done this one……….Oh ya, hi everyone.So today was my first batch of the season, been really busy with a daughter grad:)Everything is going prefect, hitting #’s nice weathe…
Top Post Images
Newest Topics
Adding new Tilt to Pi when another Tilt is using it… by Yontsey on Mon, 24 Jun 2024 with 3 posts so far
Is it possible, or what’s the best way to go about adding another Tilt to a Raspberry Pi when another Tilt is currently in a fermentation? I did a brew session yesterday and have my Tilt going, but…
Vastly Diff Temps From Chiller to Ferm by Yontsey on Sun, 23 Jun 2024 with 14 posts so far
So I finished my boil and ran my chiller on my G30. I ran it forever but got it down to 71° according to the Grainmaster. I transferred it to my SS Brew Bucket and tossed in my Tilt and it’s say…
Oxidization by cowboy7307 on Sun, 23 Jun 2024 with 4 posts so far
when we put the cooled wart into fermenter we are told to oxygenate the beer by stirring the crap out of it.But at bottling told be so careful not to oxidize it , why by string before fermentation…
Top Off/Dilution Water pH? by mikezepponi@gmail.com on Sun, 23 Jun 2024 with 10 posts so far
I have a 7.5 gallon Anvil Kettle, and I’d like to try a BIAB in it. In order to get the volume I want for my fermenter I’ll need to add a about half a gallon of water to roughly 5.5 gallons of wor…
Is my yeast pack good? by Yontsey on Sun, 23 Jun 2024 with 3 posts so far
I have a Wyeast 2565 Kolsch yeast packet I got from Northern Brewer a couple weeks ago and didn’t pay attention and tossed it in the fridge. Pulled it out this morning and can’t tell if the activat…
Favorites for a Hazy NEIPA? by Box of Rocks on Sun, 23 Jun 2024 with 12 posts so far
Two questions:1) What is your favorite yeast for a Hazy NEIPA?2) What is your favorite hop combination, and how do you add them? Am fine-tuning my hazy recipe, and would welcome your thoughts, …
Lager beer priming by Mastoras007 on Sat, 22 Jun 2024 with 9 posts so far
Hello everyone.I’m now on cold crash step on my lager, after that i will bottle some part of beer and rest of it keg.What i need to do for bottle? After priming with dextrose what temperature i …
Ideas? Feedback?
Want to share some feedback or ideas? We’d love to hear it! Just send us a message through our feedback page.
In past centuries, all beers were fermented and sometimes aged in wood. Today, brewers seek to add complexity to beers, layering flavors and aromas, by aging beers in barrels. Some of these beers are the most sought-after commercial beers on the market – ‘whales’ – and breweries make a big deal about their release. These beers inspire collectors to buy, age and sometimes trade them for a profit.
As a homebrewer, I’ve participated in about twenty barrel projects and am a big fan. While Belgian brewers have been wood-aging Lambics forever, some claim that the more-recent commercial brewery barrel-aging phenomenon was inspired by homebrewers doing what we do best – experimenting!
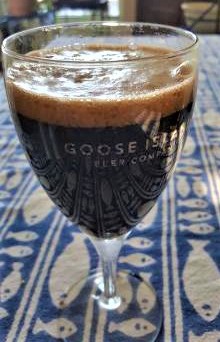
Whether it was inspired by homebrewers or not, sources generally agree that Goose Island began the movement among commercial breweries when they released their Bourbon County Stout in 1992. It is a fascinating story and, if you haven’t already had a chance, you should read Josh Noel’s book “Barrel Aged and Selling Out” – it’s not only about the development of Bourbon County Stout, but that is a key part of the story.
In this article, I will lay out the basics you need to know about wood-aging beer for homebrewers and share recipes and process for a couple of medal-winning barrel-aged beers – a bourbon barrel-aged Imperial Stout and a gin barrel-aged Saison.
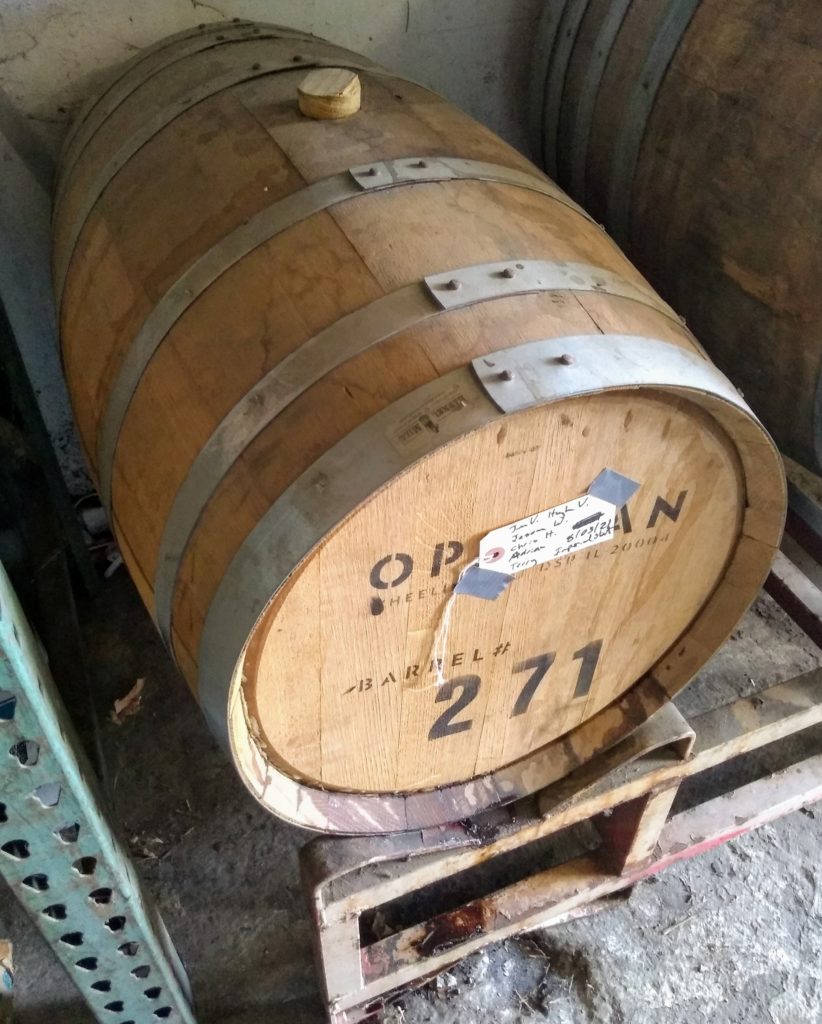
Thirty Gallon Oppidan Bourbon Barrel, on the Barrel Rack at CHAOS Brewhouse
Not Just Barrels
For most of this article, I’m going to write about barrel aging, because that is what I have experience in and know. Many homebrewers who don’t have a barrel use other products to get similar character – the most common are wood spirals.
The ratio of wood surface to beer – how much of the beer is directly in contact with the wood – is a key concept and one of the big differences between aging in a barrel and using wood spirals in a secondary vessel. The wood spirals will have a high ratio, with a higher percentage of the beer in contact with the wood, lending more wood character more quickly than a barrel.
You can buy wood spirals at many homebrew stores, at different char levels. Some brewers will soak the spirals in whiskey or bourbon before adding them to their finished beer, to lend spirit complexity in addition to wood. The spirals are added post-fermentation, often in a secondary vessel. My only experience in using wood spirals was adding wood character to a group whiskey distilling project I was a part of, and they worked well, adding a nice, dark-charred oak character to the whiskey with significant vanilla character.
Two key differences to using wood spirals over barrel aging: 1) you don’t have to acquire or store a barrel and 2) you can use spirals in typical five gallon homebrew batches.
Sourcing Barrels
For most homebrewers, the first step to doing a barrel-aged beer is acquiring a barrel. You can acquire a barrel that a commercial brewery has used for aging beer – they originally acquired it from a distillery. There is nothing wrong with using a barrel from a commercial brewery, but I prefer to get my barrels directly from the distillery. They have more spirit and wood character and are less likely to have any wild yeast or bacteria working away in the wood.
There are some online services that source barrels from distilleries and they are a reasonable option if you don’t live near a distillery, but you will pay a premium for the service and the shipping costs are significant.
I live in Chicago and have a number of distilleries near me, so have been able to acquire barrels directly. Generally, you need to reach out to the distillery and ask. One of my local distilleries, Koval, has a program for selling their barrels – I just reach out and ask them if they’ve got any barrels currently available or if they know when they will.
I’ve also developed a relationship with a smaller distillery in the area, Oppidan, and have made some excellent beers in two of their bourbon barrels. The distiller is Jeff Walsh and he founded Oppidan, located in Waukegan, Illinois in 2015. If you’ve not had his products, you should seek them out.
When I am looking for a barrel, I call or email Jeff and generally work something out. One of my vehicles is a hatchback and I can fit a barrel in it, so I drive out to the distillery and Jeff helps me load it in.
In the past, I have paid anywhere from $45 to $150 for a barrel when purchasing directly from a distiller.
Types of Barrels
All the barrels I am familiar with are made of oak. According to the internet, sometimes hickory, maple, redwood, walnut, cherry, and chestnut are used by distillers and wine makers, but I have never drank a wine or distilled spirit aged in those woods – they seem to be rare.
Aside from the wood used, another variable is the type of spirit aged in the barrel before it is used to age beer. Bourbon barrels are the most common for homebrewers, in part because bourbon makers can only use their barrel once and then must replace it with a new, unused barrel, in order to call their spirit bourbon. Whiskey or Scotch barrels are less common, because they don’t have the same restrictions.
Increasingly, homebrewers are finding other types of barrels available to them. Distillers have been aging batches of their gin in oak barrels. A small distillery near me barrel ages Sherry and Amaro (a bitter Italian digestivo). Of course, wine makers have been aging wine in barrels forever, also.
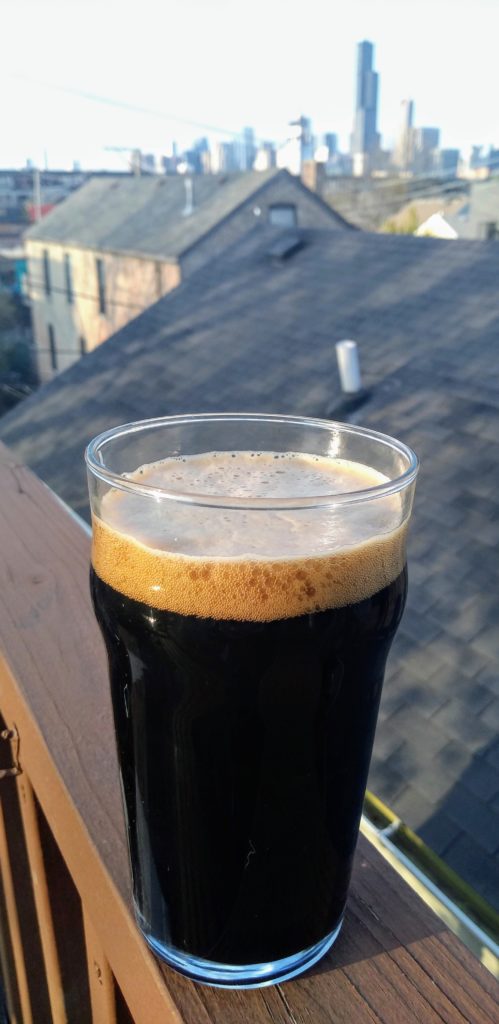
Gold-Medal Winning Bourbon Barrel-Aged Imperial Stout – brewed with Hugh Vondracek, Brandon Kessler, Melissa Edwards Hiller and Patty McGuire Cook
Char Levels
All the barrels I’ve used have been charred, to some extent. The distillers use different char levels for different effects. The reactions in the wood to charring are more complex than just smoke – charring causes a reaction with the hemicellulose in wood that breaks it down into wood sugars, essentially carmelizing the wood. Ligin is degraded, leaving vanillin compounds, which yield those characteristic vanilla flavors many of us love in bourbon and bourbon barrel aged beers. Also, higher char levels mellow the tannin in the wood.
Storing, Filling and Emptying the Barrel
One reason homebrewers may use spirals instead of barrels is the space a barrel requires.
If you have the space, though, basements are ideal for barrels, in that they keep a fairly steady temperature. The temperature changes in a garage, though, can also be interesting, as the beer and barrel expand and contract as the temperatures change, drawing the beer in and out of the wood.
You need to think through getting the beer in and out of the barrel as you decide how exactly you are going to store the barrel. If you don’t have a pump, you need the barrel to be high enough that you can use gravity to empty it, but not too high that you can’t fill it via gravity. Once, I stored a barrel in my garage, on saw horses that were about waist high – I used a ladder to fill it from above, and then emptied it into kegs below, with an autosiphon and tubing.
These days, I brew at the CHAOS homebrew club brewhouse, and we have a barrel rack which can hold four 50+ gallon barrels on the bottom rack and four or five smaller barrels on the top rack. For the club, I acquired a pump that winemakers use to transfer wine from fermenter to barrel – it is self priming and uses a diaphragm. It cannot transfer hot liquid, but for this purpose, it gently moves beer in and out of the barrel without worrying about priming the pump. I bought ours from Bobby at brewhardware.com and highly recommend it.
Barrel Sizes
I’ve used barrels from distillers that were 15 gallons, 30 gallons and 52 gallons. Because of the wood:beer surface ratio issue I raised earlier, each of these sized barrels are a little different – the smaller the barrel, the higher percentage of wood in contact with the beer, theoretically reducing the aging time. Also, availability of barrels in these sizes vary – my 15 gallon barrel was from Oppidan, but Jeff no longer uses those as his distillery has grown.
Perhaps the biggest difference that barrel size makes, though, is in how you organize the barrel project. A five gallon barrel (which can be bought new online) can be filled by one brewer. Some homebrewers may be able to brew fifteen gallon batches, but not most. For that size and larger, you need to run a barrel project, inviting other brewers to join you and then organizing the whole thing.
Organizing the Barrel Project
For my projects, I purchase the barrel, I don’t ask others to divide the cost of the barrel with me – that way, it is clear that I own the barrel and, in the end, make decisions about the barrel. But some brewers prefer to divide the cost up front and that works fine, also.
I decide upon a style and then contact other members of my homebrew club, inviting them to join the barrel project. Usually, I intentionally include newer members of the club who may not have had the opportunity to participate in a barrel project before – that’s how we build the homebrewing community. So, for my projects, it’s usually a mix of more experienced and less experienced brewers.
Once the roster for the project is set, I come up with the recipe and share it with other brewers. Because these beers are going to be blended in the barrel, I often will give options in the recipe – for example, if its an English barleywine, I may suggest using either East Kent Goldings, Challenger or another English hop, depending on what the brewers might have on hand or can easily get ahold of. If there is something important in the recipe, though, I make sure I note that – for the barleywine, for example, using Maris Otter as the base grain is essential.
I give the brewers a deadline when we’d like the beers to be done and then a day to fill the barrel. They can join me for that, but they don’t have to – I go ahead and fill the barrel with their beer. If a brewer misses the deadline, I don’t stress – I just add their beer when its ready.
How Long to Age? The ‘Barrel is Magic’ Theory
How long to age in a barrel is the key question for many homebrewers. In my experience, the only barrel I’ve used where it was an issue was the small 15 gallon barrel, because of the high wood:beer surface-area ratio. For larger barrels, I have become an adherent of what a friend once termed the magic of the barrel. Basically, I fill the barrel and leave it alone. At the beginning of the project, I decide how long I’m going to let the beer age, which is always at least a year for the larger barrels, and I don’t muck around with it.
It is tempting to taste the beer as it ages, but in my experience, that often leads to the barrel being emptied too early. I have a reasonably good palate and I find it hard to gauge when a beer is done in the barrel or not. As my friend put it, let the magic of the barrel happen, don’t rush it, don’t interfere with it.
Obviously, as you age more batches in the barrel, both it’s spirit and wood character will diminish and you can age batches longer in it, if you wish. Generally, for the first use of a barrel, I age six months for a 15 gallon barrel, 1 year for a 30 gallon barrel, and 1.5 years for a 50+ gallon barrel. For successive uses, I often increase the time.
If a beer comes out of the barrel and has too much barrel character, it’s a simple problem to solve – blend it with some non-barrel aged beer of the same style. But I have found that is seldom necessary.
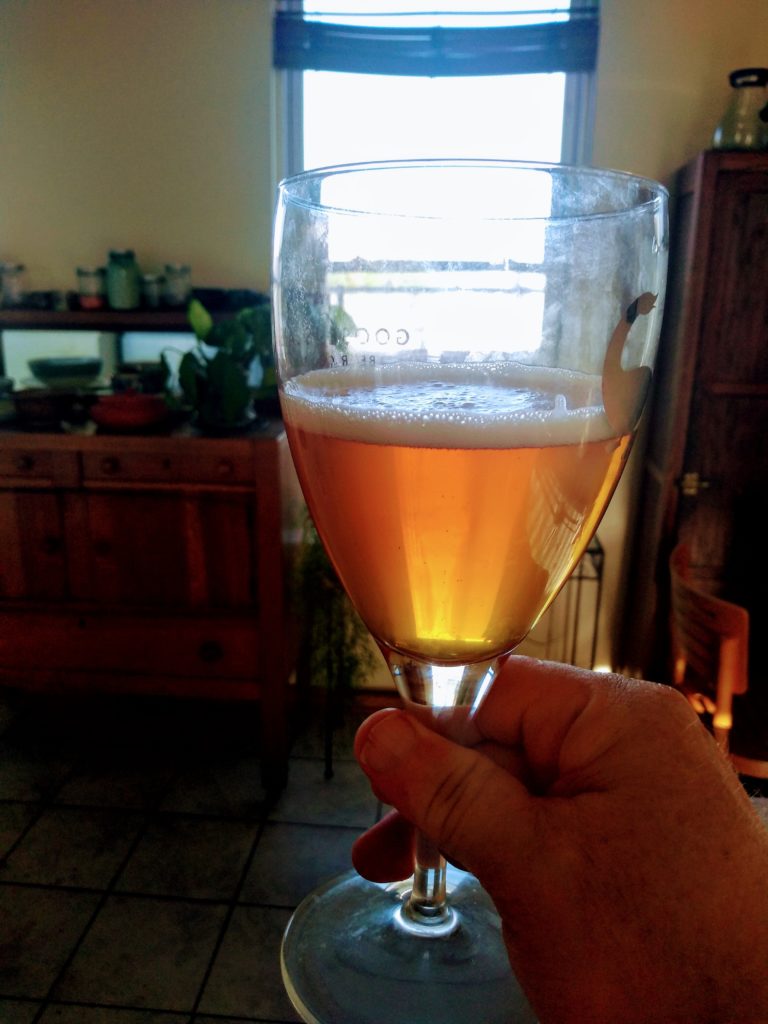
Silver Medal Winning Gin Barrel-Aged Saison, Brewed with Hugh Vondracek, Americo Ochoa, Ben Resch, Bianca Alley, and Freddy Zavala
Pairing Styles with Barrels
Bourbon barrels seem to be made for pairing with Imperial Stouts – such a delicious combination. I have also aged Imperial Porters, American Barleywines, an historic Arctic Ale (a dark, sweet, strong Burton ale brought by Shackleton on his Arctic expeditions) and a Belgian Dark Strong in bourbon barrels.
Other barrels may call for other styles. The gin barrel I used was a lighter char and lent significant gin botanicals to the beers aged in it. We aged a series of Belgian-ish styles in it, including Saison, Golden Strong, Biere de Garde and a Quad.
Bourbon Barrel-Aged Imperial Stout
I’ve learned from experience that I most enjoy Imperial Stouts aged in bourbon barrels that push the upper limits of gravity, both starting and final. The barrel, with its oak tannins, tends to thin out our impression of the beer’s mouthfeel, and for a barrel-aged imperial stout, a big, full sipping beer is the hallmark.
A couple of years ago, our bourbon barrel-aged Imperial Stout won a gold medal at the annual Brixtoberfest competition. For that beer, we aged it in a 15 gallon Oppidan bourbon barrel for six months, as the first beer in the barrel. Five brewers got together and we brewed three typical five-gallon batches together, on the same evening. We fermented in a temperature controlled ferm room at 65F and when fermentation was done, we added it to the barrel.
Typically, we don’t worry about fining or aging the beer before adding it to the barrel – it will have plenty of time to smooth out and clarify in the barrel. After barrel-aging, I emptied my portion into a keg and force carbed it, then bottled it with a beer gun and stored the bottles. It had aged about nine months in the bottles before I sent it to the competition, so had aged about 15 months total.
The Numbers: Batch Size – 10 gallons Mashed at 156F Single Infusion, Batch Sparge Fermented at 65F Original Gravity 1.121 Final Gravity 1.026 Bitterness 54 IBUs Color 55 SRM
Hop Schedule: 5 oz Challenger (6.8%) 60 mins 4 oz E.K. Goldings (5.6%) 20 mins
Yeast and Fermentation: 4 packs of US-05 Clarity Ferm Fermented at 65F
Gin Barrel-Aged Saison
In 2019, a Saison we aged in a gin barrel won a silver medal at the Happy Holidays competition in St. Louis. The gin barrel was from Koval, which had first aged a rye whiskey in it, then a batch of gin. This was the second beer we aged in this thirty gallon barrel. We left the beer in the barrel for one year, I kegged our portion, force carbonated it, bottled it using a beer gun and stored the bottles. We entered the beer in the competition about six months after bottling it.
The base Saison was purposefully lemon-forward – we used Sorachi Ace hops which lent a prominent citrus and lemon flavor, which I think worked wonderfully with the wood and gin botanicals.
The Numbers Batch Size: 5 gallons Original Gravity: 1.057 Final Gravity: 1.008 Bitterness: 34 IBU Color: 4.3 SRM Single Infusion Mash 152F Batch Sparge
Grain Bill 9 lbs Pilsner 1 lbs Munich Malt 1 lbs Wheat Malt 12 oz Table Sugar
Hops 0.75 oz Sorachi Ace (13% aa) 20 min 0.50 oz Sorachi Ace 15 min 0..50 oz Sorachi Ace 10 min
Yeast and Fermentation Omega Yeast’s French Saison Clarity Ferm Fermented at 65F, cold crashed at 34F
Many homebrewers dream of turning their avocation into a vocation – becoming a professional brewer. This series on Pro Brewers will introduce a professional brewer, briefly exploring their path and journey. Then, each article will delve into their current brewery and situation, and share a favorite recipe that homebrewers can try.
I first met Leah Dienes at the Homebrew Con in Grand Rapids, Michigan. Before the conference, the BJCP held a session on the Kentucky Common style, and Leah helped lead the session and also served some samples of this home-grown style. In the session, her seriousness and depth of brewing knowledge struck me immediately.
In some ways, Leah followed a typical path to her current position as co-owner and brewer at Apocalypse Brew Works in Louisville, Kentucky. But it also took a few unique turns.
Hobbyist Beginnings
From the beginning, creative endeavors held Leah’s interest. She studied music at the University of Louisville and Boston University, before pivoting to graphic design at Northeastern University. Afterwards, she returned to Louisville and worked in that field, including at Fearless Designs.
But while that was all happening, Leah expanded her creative reach by exploring homebrewing. Like many homebrewers, her homebrewing took off when she connected with a local homebrew club. In her case, she joined LAGERS, the Louisville Area Grain and Extract Research Society, founded in 1989.
Through LAGERS, she benefited from the tutelage of Darwin ‘Dibbs’ Harting and other experienced brewers who gave feedback on her beers and shared brewing insights. Eventually, she served as the club’s president. Most importantly, she began a friendship with Bill Krauth, another LAGERS member, with whom she would later form a partnership that begat Apocalypse Brew Works.
Winning Medals
Imbued with a meticulous nature, Leah kept detailed brew logs and honed her homebrewing expertise. Soon, she began earning medals at homebrew competitions. Lots of them.
At one competition, where she was volunteering, BJCP president emeritus Gordon Strong tasted one of her gold medal winning beer. He took her aside and urged her to go through the BJCP process. She took the advice and earned the rank of National judge and currently serves as an assistant representative for the Midwest region in the BJCP.
Making the Transition to Pro Brewer
As she continued homebrewing, Leah’s career in design became less fulfilling. It hit a significant bump when the economy tanked in the late 2000s, during what came to be called the Great Recession, and the slow recovery that followed. She began exploring the possibility of making the transition to professional brewing and secured an internship at Bluegrass Brewing Company. And she and Bill Krauth started planning what became Apocalypse Brew Works.
Opening a brewery presents many challenges, including capital – money. Leah and Bill faced this obstacle and met it using sweat equity and the tools at their disposal. Leah, in addition to her brewing expertise, brought design and marketing experience. Bill owned a heating, air conditioning and plumbing business, and had the expertise to construct much of the equipment they needed.
Building a Brewery
Bill also owned his business’ building, so they didn’t need to buy or lease space. Together, they built out the brewhouse and taproom, which opened in 2012. To save on costs and to act on their commitment to sustainability, they made liberal re-use of found objects and equipment used in the build out.
Staffing also followed the same model, they did it all – brewing, marketing, sales, social media and bartending. In recent years, as the brand grew, they hired some help, and after a contraction during the pandemic, continue to responsibly build. Recently, Bill retired and sold his interest in the brewery.
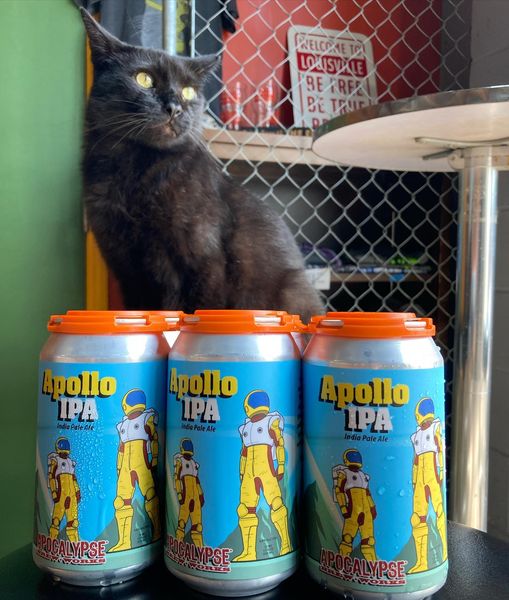
Still on the job, other ‘staff’ helping out since the start include feral brewery cats working to keep the rodentia population out of the place. They’ve become less feral over the years, and you can view a video of them getting groomed here. In addition to visiting the cats, people come to the taproom for a wide-range of programs, including yoga, pop-up markets, outdoor movies, food trucks and live music.
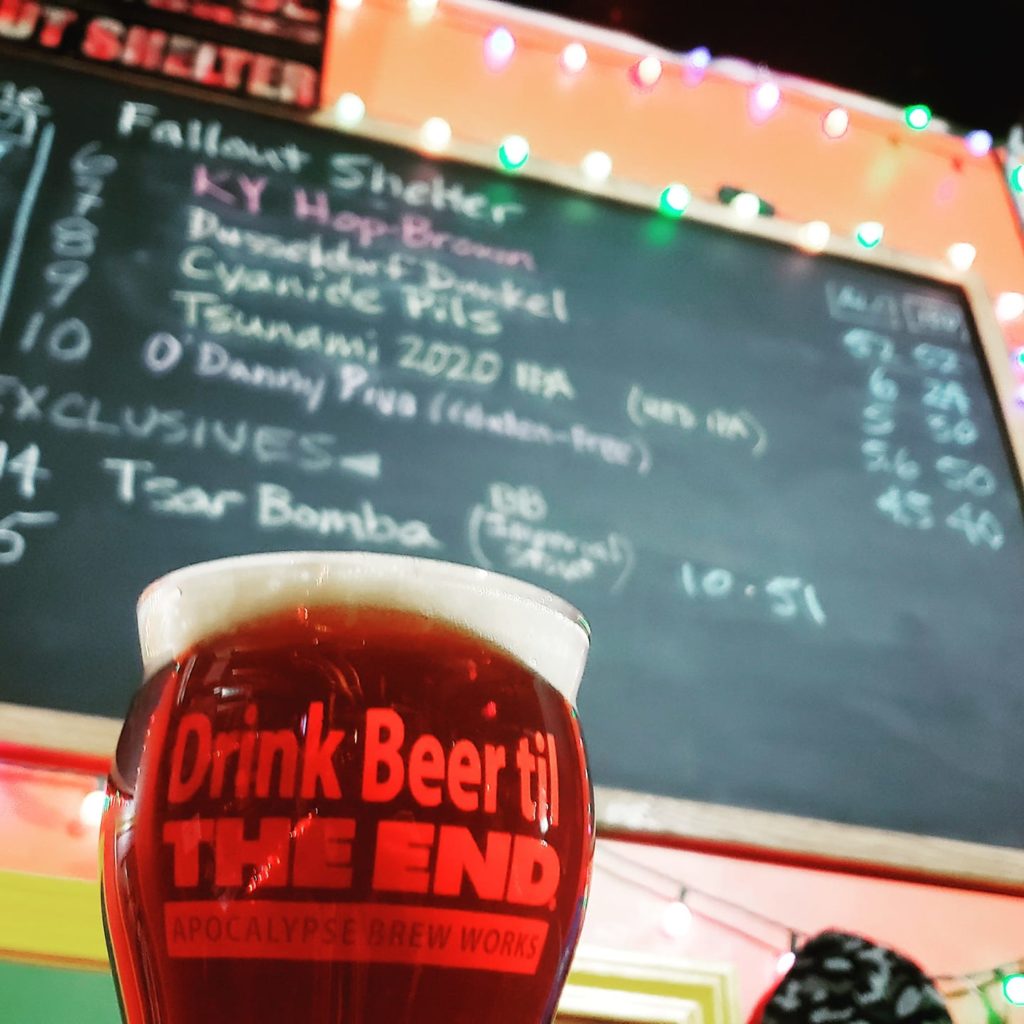
The Apocalypse theme plays throughout the brewery, including the taproom, named “The Fallout Shelter”. Their slogan, “Drink Beer Til the End”, and their beer names (Cream-ation, Fallout Dust, Pestilence Porter, Atomic Amber, etc.) carry on the theme. The setting is industrial and, while not dystopian, seems appropriate!
Award Winning Smoked Weizen Recipe
Leah agreed to share with us a recipe that she first brewed in 1989, according to her early beer logs – a smoked weizen. It began as a recreation of a smoked Hefeweisen she enjoyed in Bamburg, Germany. It won medals, including the President’s Choice Award in FOSSILS’ Smoked Beer Competition.
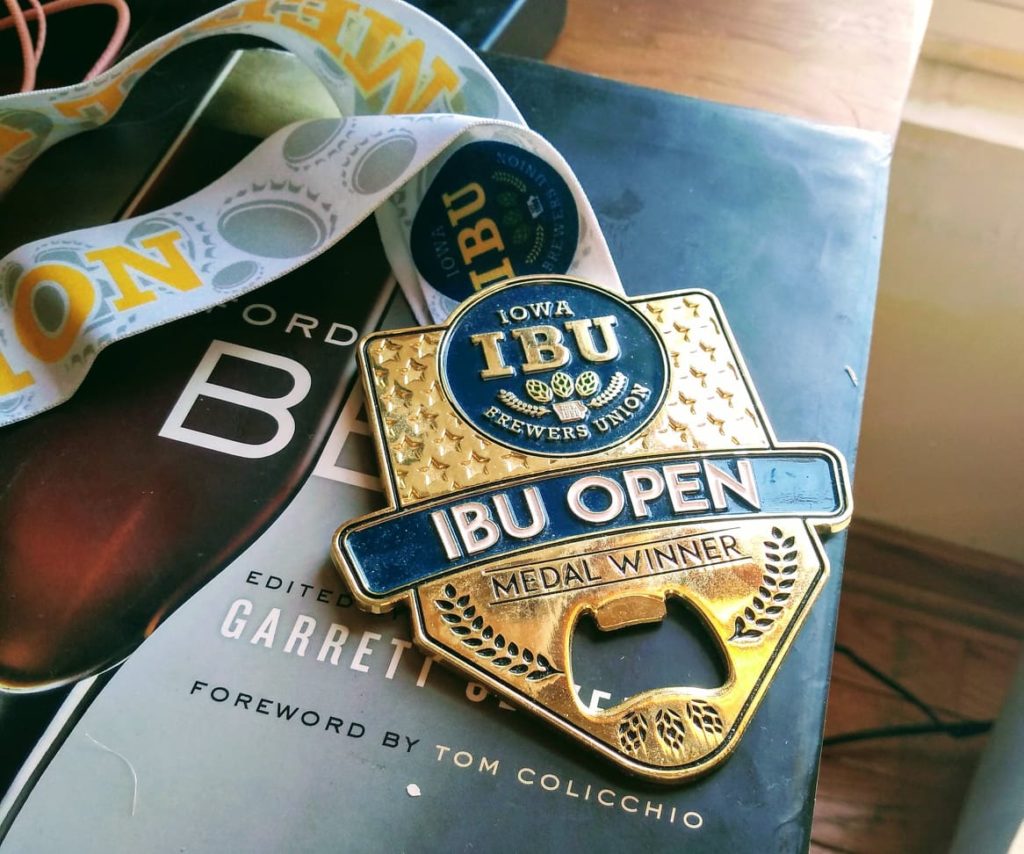
In the last year-and-a-half, the pandemic and all its repercussions impacted all of us. For me, as a homebrewer and BJCP (Beer Judge Certification Program) judge, the loss of competitions hit me unexpectedly hard. I aim to volunteer as a judge in about 15 competitions a year and found that I sorely missed those opportunities. Prior to the pandemic, I last judged at a competition in March 2020, at the IBU Open in Des Moines.
Last week, in a remarkable coincidence, the first post-pandemic competition I judged at in-person was also the IBU Open, the 2021 version! I cannot overstate how great it was to be back with other homebrewers, tasting and evaluating beers. I enjoy that process (and the beers), but perhaps more importantly, homebrewers form a great community and one that I missed. Hanging out for two days with a few dozen other homebrewer-judges lifted my spirit!
Keeping It in Context
I don’t mean to imply that somehow the loss of homebrewing competitions over the past sixteen months amounted to a tragedy. It didn’t. The unnecessary Covid-19 death of a friend from my congregation was a tragedy. My 93 year old father-in-law being unable to visit his wife in her nursing home for the last two months of her life because of Covid-19 was heart-wrenching. Her death alone, without family and hastened no doubt by the absence of her husband, was deeply sad.
None of what I’m writing today reaches that level – as a fellow BJCPer said at the beginning of the pandemic, “It’s just beer.” If you suffered economic hardship, loss of employment, social or family upheaval, isolation, anxiety, sickness or any of the many other serious ways the pandemic hit us, please know that I’m not in any way comparing that to homebrew competitions.
But I did want to share my absolute joy at being back with other homebrewers, at a well-run competition!
What About Virtual Competitions?
I participated in a couple of virtual competitions during the pandemic. I’ve heard from some judges how much they enjoyed them, but, for me, I found them lacking, and have identified two reasons.
First, I enjoyed connecting with my judge partner via Zoom at a virtual competition. But, overall, virtual competitions lacked the sense of community you get at an in-person competition. At a competition, you sense a community of homebrewers coming together, for an event focused on our hobby. In short, I missed people. Connecting with one fellow homebrewer lacked the impact of being in the room with dozens of them. I missed chatting during the breaks, sharing lunch with other homebrewer judges and chatting about their last beer flight.
Secondly, I don’t think the quality of virtual competitions matches in-person competitions. Multiple bottles per entry presents an issue, but I think the quality issue revolves more around focus. It might be particular to me, but I suspect it impacts other judges, also.
One of the key qualities of good judges relates to their ability to focus on the beer in front of them. I think in-person competitions tend to help judges do that. It’s an event, you travel to it, you dedicate a day to it, it’s a big deal. Judges at in-person competitions work as part of a team of scores of volunteers all making it work together. This encourages you in subtle ways to do a good job, to focus. At home, I found it to be more casual and, perhaps, easier to make it through a flight without laser focus.
Obviously, this isn’t black-and-white and I’ve stated this too absolutely, to make my point. But, bottom-line, I prefer in-person competitions.
The 2021 IBU Open
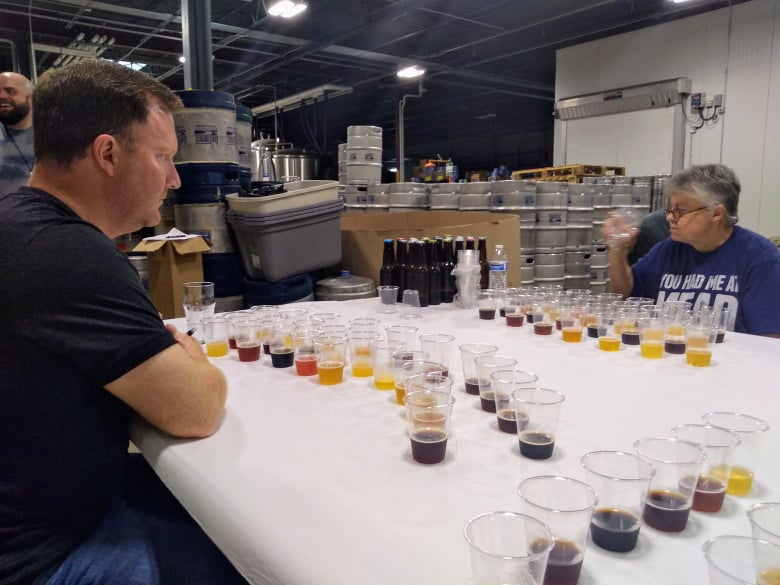
I drove 335 miles from my home in Chicago to Des Moines, about a 5.5 hour trip. Arriving at Confluence Brewing in time for a judging session on a Thursday evening. Two other out-of-town friends also drove in that day – Ted from St. Louis and Sandy from Indianapolis. What a delight to see them again! That evening, I evaluated a flight of six beers, on a table described as Pale European Beers.
On Friday, I judged at two sessions and then two more on Saturday. After one of my assigned flights, the competition organizer asked if I could help out on another table, evaluating NEIPAs. That table included too many entries, so I and another judge helped with four of the entries.
All the flights I had were reasonably sized, so it appeared they had a nice ratio of judges to entries. The competition director, Zach Rice, who did a great job, had limited entries to this first post-pandemic iteration of the competition. Back in the winter and early spring, Zack couldn’t know how quickly vaccination would happen and its impact on the number of judges who would volunteer. Thankfully, the vaccine became widely available before the competition, leading to a good turnout of judges and stewards.
Slide Scoresheets, Medal Rounds and Best of Show
Two interesting aspects of the organization of this competition: 1) the use of the ‘slider’ scoresheets and 2) having the medal rounds (sometimes called mini-bos) for each category determined by a different set of judges than those who evaluated the beers.
I like the slider scoresheets, But, it also feels like it’s been a long time since I filled out a traditional, long-form scoresheet. Honestly, I’m kind of looking forward to doing that again! The medal round issue seems a little more complex. Good reasons exist to organize a competition this way, but you also lose something. Specifically, the competition loses the benefit of judges calibrating their palates to a style.
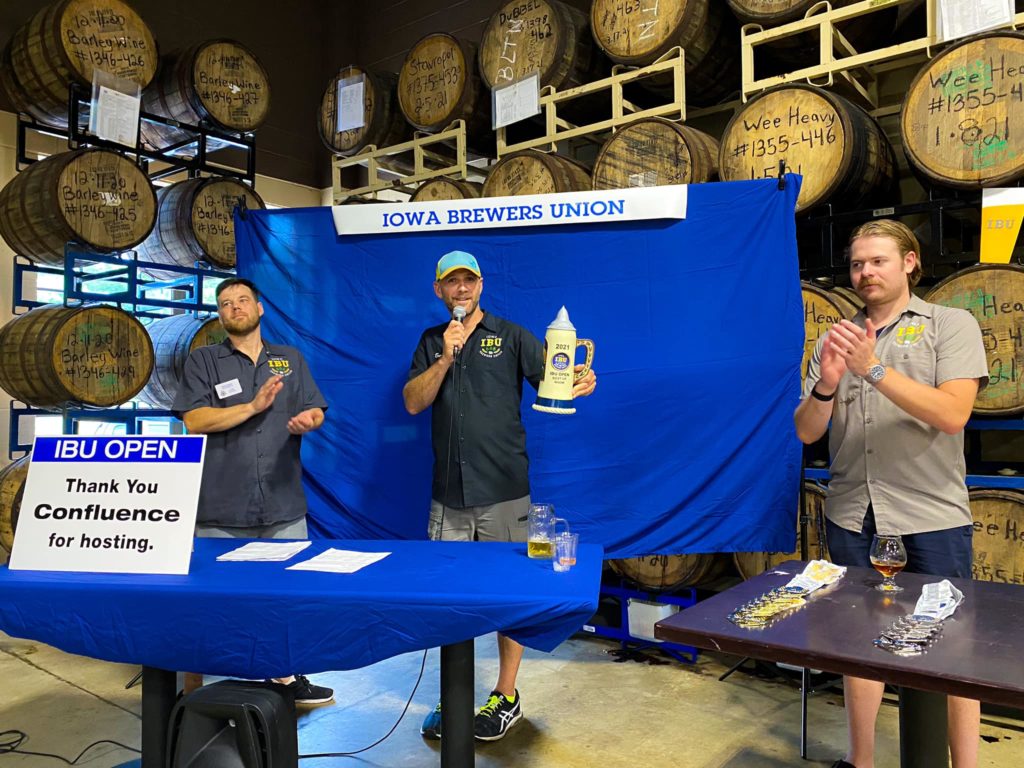
For the Best of Show round, five of us comprised the panel, including two brewers from our host brewery, Confluence. The organizer presented us excellent gold-medal-winning beers. In the end, we selected an American Strong made with rye as the Best of Show beer. Entered in the Alternative Grain category, this beer delighted us! If you’d like to brew an American Strong, search for recipes here.
Confluence Brewing Company
The competition was held in the packaging area of Confluence Brewing Company on the southside of Des Moines. Founded by John Martin – who joined us at the Best of Show along with Confluence’s production manager, Josh Maxon – Confluence boasts a fun taproom and a large taplist, with over thirty beers available. I enjoyed their version of a Czech Pilsner, called Over the Ivy. Coming in at less than 5% abv, I thought this beer made a great post-judging beer.
The taproom boasts both indoor and outdoor spaces and service at the bar. With no no kitchen, the brewery hosts occasional food trucks and patrons may bring in dinner from other restaurants.
The Iowa Brewers Union
The Iowa Brewer’s Union, a homebrew club based in Des Moines, annually organizes the IBU Open. The club meets every third Monday of the month. Besides the annual competition, the club also supports charities and events across the states. According to their Facebook page, the club also runs its own homebrew serving night (Jimmy Carter Happy Hour) at its meeting location, El Bait Shop. On Thursday nights, at the Jimmy Carter Happy Hour, IBU members use the club jockey boxes to serve customers samples of their own local home brew.
I hope, in this post-pandemic world, you share my joy at getting back to homebrewing not just as something you do at home, as an individual, but as a hobby, something you enjoy with a great community of other homebrewers.
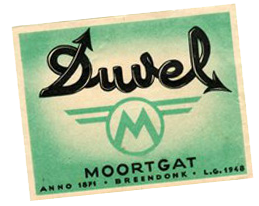
One of my favorite beer styles is the Belgian Golden Strong – effervescent, pale, dry, and complex with aromas of fruit, herbs and flowers. If you’ve had Duvel, Piraat, or Delirium Tremens, you know what I’m talking about. This article looks at the colorful history of the style, its parameters and components, brewing it (with a recipe) and ends with a conversation with a commercial brewer, Kevin Lilly, who crafts an excellent US version of the style for Lo Rez Brewing.
History
Duvel became the iconic representation of the Belgian Golden Strong style, originally developed by Brouwerij Moortgat in Breendonck, Belgium. The lore of its genesis revolves around Albert Moortgat obtaining some of the Edinburgh strain of Scottish yeast from McEwan’s or Younger’s breweries. Exactly how Moortgat obtained the yeast remains unclear. Some swashbuckling accounts have him smuggling it out of Scotland in a milk canister. More likely, perhaps, is the more pedestrian version that he propagated it from a bottle of Scottish ale he bought. In any case, Moortgat used Scottish yeast to create the precursor of Duvel, immediately after the end of World War I, called Victory Ale.
Victory Ale had little to do with current day Duvel, except for its strength. It was a dark, flavorful beer. An aficionado referred to it as a ‘real devil’ or duvel in Flemish, and the name stuck, soon being officially re-named Duvel.
The tale takes a dark twist with the German occupation of Belgium, when Albert Moortgat served as mayor of Breendonck. Evidence amassed afterwards points to Albert’s growing embrace of authoritarian ideology. As head of the local government, he served as a leader of the Flemish National Union party. This fascist party welcomed and collaborated with the German occupiers. During that time, Moortgat’s advertising slogan was “One People, One Nation, One Beer”, chillingly echoing the Nazi slogan “One People, One Nation, One Leader”.
Following the liberation of Belgium from the Nazis, Albert was arrested, convicted and served five years in prison for his crimes as a Nazi collaborator. After his release, the family decided having a Nazi at its head was bad marketing. In response, the next generation of Moortgats, Emile and Leon, took over. In the decade following the war, they strengthened the brewery generally. Starting in the 1960s, they changed it forever.
At that time, they partnered with the leading Belgian beer scientist of the era, Jean De Clerck. A university professor, De Clerck authored the highly-influential two-volume tome Textbook for Brewing. Earlier, he created Chimay Blue, the iconic Dark Strong Trappist Ale, at the Abbey of Notre Dame de Scourmont. Now, working with Moortgat, he lightened Duvel’s color, using malts specially kilned for the brand, and dried it out. Most influentially, he isolated strains from the beer’s original Scottish yeast, honing the distinctive herbal and floral aromatics of the style. The result was what we now consider the Belgian Golden Strong style, soon emulated by other breweries.
Style Characteristics
Today, the Golden Strong is an effervescent, complex, pale, dry, strong, fruity and floral ale. An unusual combination of easy-drinkability and high abv, it bears significant similarity to the Trappist Tripel style but with some important differences. Tripels, although dry, often do not end up as dry as the Golden Strong style and possess a somewhat fuller mouthfeel. Most strikingly, the Golden Strong style favors pomme esters – apples and pears – over the phenolic spiciness that partially defines the Tripel.
Hallmarks of the style include both high carbonation and an impressive, long-lasting white head. This effervescence combines with the beer’s dryness and lack of heavy alcohol flavors to make the style remarkably easy-to-drink.
A soft malt aroma and flavor floats through a tasting of the style, supported by a firm but not assertive bitterness.
Floral and herbal aromas also mark the style, lending a sense of delicacy to this style, another surprise from this big, strong and complex beer.
The style finishes dry – a critical component of the style that enhances its easy-drinkability. Some alcohol may be perceived, but nothing harsh, hot or solvent-like.
The Numbers
According to the BJCP style guidelines, the Belgian Golden Strong comes in at:
Bitterness 22-35 IBUs
Color 3-6 SRM
Original Gravity 1.070 – 1.095
Final Gravity 1.005 – 1.016
ABV 7.5 – 10.5%
Brewing the Belgian Golden Strong
The challenge in brewing this style lies in making a flavorful, complex, high abv beer that at the same time is dry, easy-to-drink and delicate.
As with many Belgian styles, the use of sugar in brewing helps dry out the beer. Homebrewers often add it to the boil – you’ll read below about the alternative process that Kevin Lilly at Lo Rez uses. The addition of sugar gives the yeast something to eat that they can easily process. This addition adds strength and abv without adding body, sweetness or final gravity points to the finished beer. While Belgian candy sugars may be used, I think that table or cane sugar works well, because you are not looking for any flavors or even color from the sugar addition.
In addition to adding sugar, mashing in low also helps reach the goal of a dry beer. Mashing in the 148 – 150F range activates enzymes which break down the starches and proteins into smaller strands compared to higher mash temperatures. Shorter strands lead to a more fermentable wort which leads to a drier beer. Brewers also sometimes encourage this process by mashing for longer than the standard sixty minutes.
Typically, Pilsner malt makes up most or all of the grain bill for a Golden Strong, lending its typical soft maltiness and breadiness to the beer. Because of the Pilsner-forward grain bill, some brewers will boil for ninety minutes or more to drive off the precursor to DMS, a canned corn off-flavor, which is present at higher levels in Pilsner than in other malts.
Some of the style’s delicateness, floral and herbal aromas come from hops. Noble or English type hops usually make up the hop bill, but an American variety that traces its lineage to Hallertau, such as Mt. Rainier, makes an excellent choice, also.
Yeast selection plays a critical role in this style. While both esters and phenols are present in most Golden Strongs, they tend to emphasize the fruitiness over the spiciness. Some homebrewers purposefully underpitch yeast for Belgian styles, to stress the yeast and encourage the production of esters and phenols. Others think it unnecessary, because Belgian yeasts have been developed over the years to produce significant esters and phenols. Underpitching may lead to other off-flavors and, in the worst case, an under-attenuated beer.
Ramping up the temperature during fermentation is another approach – it both encourages the production of esters and for the yeast to fully attenuate the beer, making the final product more fruity and drier. I often start the fermentation off at 65F with the other ales in our temp controlled ferm room, then will put the fermenter on a heating pad that raises the temp to 70 – 72F, then will move it out of the temp controlled ferm room and let it free rise to 80+F for the final phase of fermentation.
For homebrewers who keg, the Golden Strong may be an excuse to bottle condition – for a change of pace, because it’s traditional, and because carbonation impacts the style so critically. If you can find small champagne bottles, they make ideal bottles for bottle conditioning this style. But in any case, bottle conditioning can add a creaminess to the final beer. In any case, whether you bottle condition or keg, it’s critical that the brewer make their beer effervescent.
Mash the malts at 148F for sixty minutes, single infusion and batch sparge method
Water Chemistry
Chicago municipal water
Add 8 ml lactic acid to the mash
Hops
1 oz Mt. Rainer (6% aa) for 60 minutes
1 oz Mt. Rainer for 10 minutes
1 oz Challenger (8% aa) for 10 minutes
Yeast
White Labs WLP 570 Belgian Golden Ale or
Omega OYL-056 Belgian Golden Strong or
Wyeast 1388 Belgian Strong Ale
Dry yeast alternatives are Lallemand’s Abbaye Belgian or Fermentis’ Safbrew BE-256 Belgian although the liquid yeast alternatives are preferable for this style
Other
Whirlfloc or Irish Moss towards the end of the boil
White Labs Clarity Ferm pitched with the yeast
Numbers
Batch Size 5.5 gallons
Brewhouse Efficiency 60%
Original Gravity 1.075
Final Gravity 1.004
ABV 9.3%
Bitterness 35 IBUs
Color 4 SRM
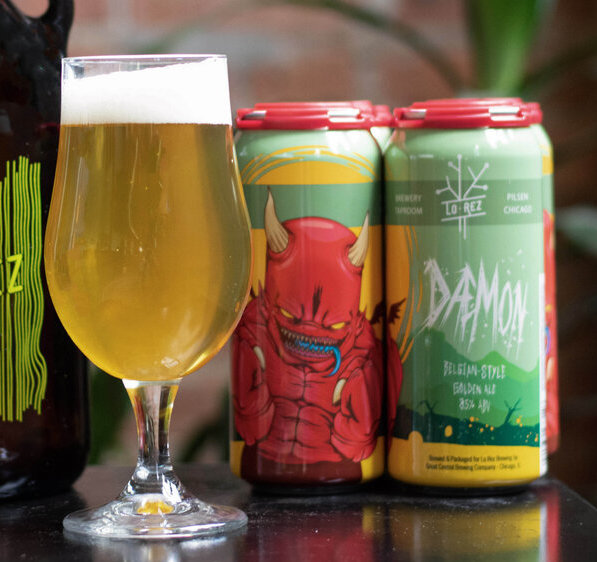
Commercial Golden Strong Ale – Lo Rez Brewing’s Daemon
Among the very best US-produced Golden Strong’s I’ve tasted comes from Lo Rez Brewing in Chicago. Thanks to Lo Rez brewer Kevin Lilly for visiting with me about their offering, aptly named Daemon. Daemon is a programming term (meaning a program that runs in the background), a theme Lo Rez uses throughout their lineup. But it also references Duvel – as an archaic spelling of ‘demon’.
Daemon leads the Lo Rez lineup – its flagship beer, in terms of sales. While I found that unexpected, it may not be surprising that a light colored, dry, strong but easy-to-drink and flavorful beer sells well. “It’s super-drinkable like a lager,” according to Lilly, “but it has so much more flavor and aromatics.”
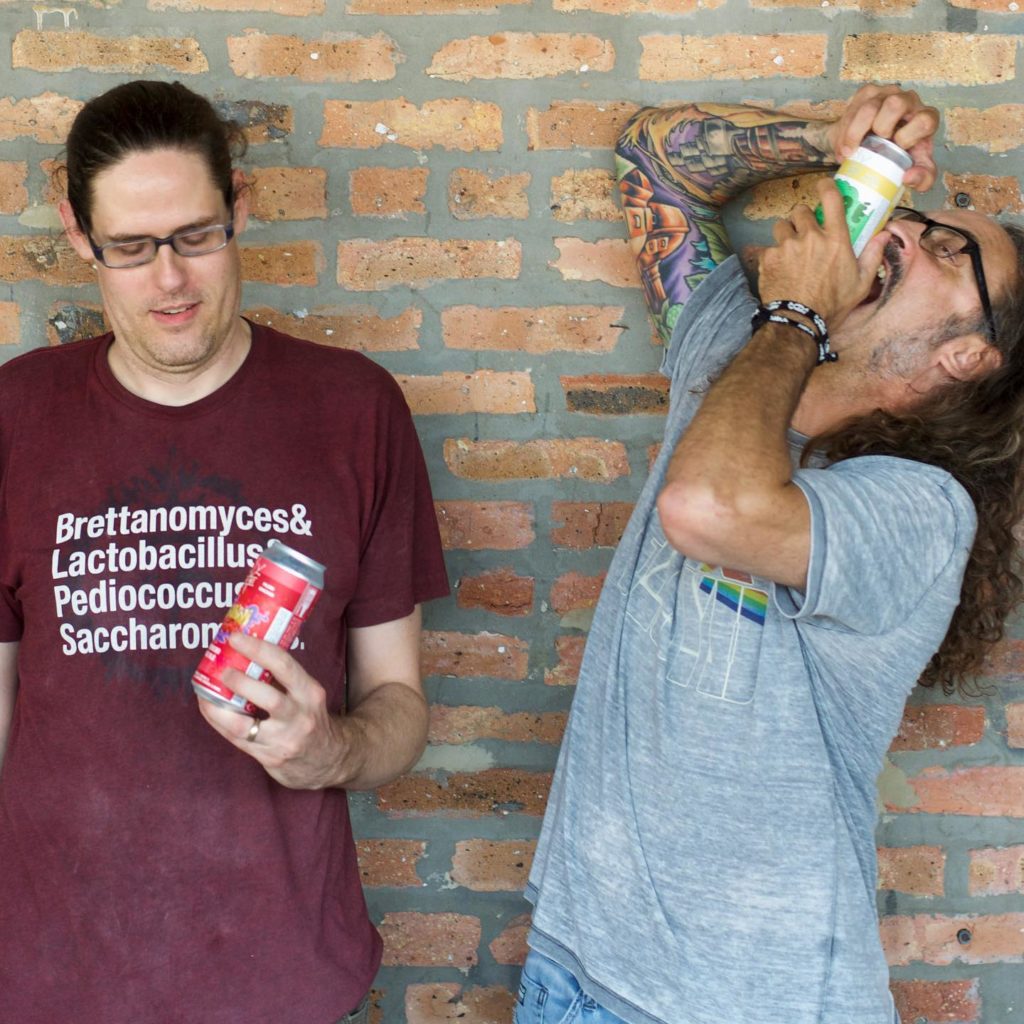
Lilly and his Lo Rez co-founder, Dave Dahl, began brewing the precursor to what became Daemon as homebrewers. Dialing in the yeast character challenged them as they developed the beer. Eventually, they settled on the Ardennes strain, which they still use today. For the homebrewer, that strain is available from White Labs as WLP545 (Belgian Strong Ale) and Wyeast as 3522 (Belgian Ardennes).
To lighten the beer, Lilly adds sugar to the recipe, but not in the boil kettle, which he found occasionally led to a stalled fermentation – the yeast would mow through all the simple sugar and give up. Instead, he adds a sugar syrup to the fermenter, over three days. He begins to add the sugar when the beer’s gravity nears 1 degree plato (about 0.004 brewer’s gravity points) above the target final gravity.
From tasting the beer throughout these final days of fermentation, Lilly found that the yeast created many of the aromatics he seeks after the sugar additions. He finds those aromatics critical and fine-tuned them after working with the Ardennes yeast over and over, learning its subtleties.
He makes the simple syrup in a 50:50 ratio (by weight) of sugar to water, which he never boils but does pasturize at 165F. The only other fermentable he uses is Pilsner malt, with 80% Pilsner to 20% sugar.
Lo Rez Brewing Founders Kevin Lilly and David Dahl
For hops, he adds Chinook at 60 and 20 minutes, and finishes with a dose of Zuper Saazer (a Michigan variant of the Saaz) at whirlpool.
For Daemon, fermentation starts at 68F and free rises to 75F within 24 hours, and Lilly maintains that temperature until fermentation completes.
I drink Daemon often, and like the best examples of the style, it hides its high abv well and its dry finish enhances its drinkability. It combines complexity and delicateness in a compelling way, with an appealing herbal and floral aroma.
Congratulations, you stand on the precipice of a remarkable hobby – brewing – one practiced by over one million homebrewers in the US! Making something by hand appeals to many of us – baking bread, building a bookshelf, growing a garden, cooking. Similarly, brewing a handmade beer brings a sense of satisfaction, combines craft and science, and in the end you get beer! For me, some of my favorite memories involve sharing a handmade beer with friends and family.
The satisfaction we get from sharing something we made, with our own hands, enhances our lives. Nothing wrong with drinking professionally-made craft beer, it’s great, but to be able to say “I made this” elevates your spirit. For many brewers, they love the satisfaction of handcrafting and sharing their beers. It makes the process of enjoying beer more intimate, more personal.
Further down this article, you will find the recipe and step-by-step explanation for brewing a Sweet Stout using malt extract. Before we get to that, let’s go over a few preliminaries.
So Many Choices!
Many years ago, I brewed my first batch of beer using malt extract. At that time, most brewers began brewing that way and I continued to brew extract batches for two or three years before switching to all-grain brewing using Denny Conn’s basic batch sparging method.
That being said, extract brewing represents only one of the possible methods to use for your first batch. Since I began brewing, the advent of brew-in-a-bag changed the landscape for new brewers significantly, by removing many of the equipment hurdles. Keep an eye out here for a future article about brew-in-a-bag for beginning brewers. I’ve helped many brewers at my club (CHAOS in Chicago) learn to brew all-grain using batch sparging. In addition, the development of electric all-in-one breweries like Grainfather, Brewzilla and Brew Easy offer new brewers another appealing (if somewhat costly) option.
This article in no way implies or argues that your first batch *should* be brewed with malt extract – today, beginning brewers have lots of options. Instead, this article intends to walk the aspiring brewer through their first batch if they choose to use a traditional entry to the hobby – extract brewing.
Extract Brewing
For many brewers, brewing their first batch with extract offers a simplified, accessible approach to get into brewing. The equipment costs can be low, so they can metaphorically stick their toe in the water and see if they like the hobby before making a more substantial commitment.
By eliminating mashing, extract brewing eliminates a significant piece of equipment and an hour or more of time from your brew day. Essentially, malt extract is the result of mashing. Using extract, you lose some flexibility in creating your wort, but that can be made up for by steeping specialty grains, a remarkably simple process that adds layers of complexity and flavors to your beer.
You may read that malt extract beers are inferior – don’t believe it. Many brewers make excellent extract beers and win medals at competitions. Focusing on sanitation and fermentation, instead of mashing, helps beginning brewers make better beer.
This Sweet Stout recipe was among the first beers I brewed, probably my third or fourth, and it won a silver medal in the stout category at a four hundred entry competition.
Why a Sweet Stout for My First Brew?
A style that is full of flavors may cover up some off-flavors that typically appear in a brewer’s first few batches – I think stouts generally are great for beginners and the sweet stout is especially good. It’s got both nice roast and chocolate, a little caramel and dark fruit, finishes off-dry and presents a medium to medium full mouthfeel.
Equipment
Many of us have a five-gallon stock pot in our kitchens, if not you’ll need to buy one (and will use it for other things, in any case, like making stocks or cooking big batches of chili). You’ll also need a whisk or spoon long enough to stir the batch, which you probably already have. A kitchen or cooking thermometer also comes in handy – using an instant read electronic thermometer or candy thermometer you already have works great.
You’ll need a fermenter – most of us won’t have anything in the kitchen we can repurpose for that, so you’ll need to buy a plastic fermentation bucket, lid and airlock.
Looking ahead, when it’s time to bottle, you’ll need a bottling bucket (similar to your fermenting bucket, but with a spigot towards the bottom), an auto-siphon and plastic tubing (to get the fermented beer from your fermenter to the bottling bucket), a bottling wand and hand capper. A future article in this beginning brewing series will go through bottling step-by-step, but for now, if you want to buy everything you’ll need at once, add those bottling supplies to your list.
This list represents the bare-bones approach – you need these items, but you can buy many other helpful pieces of equipment, for example, a hydrometer.
If you have a homebrew store near you, great – go there and get what you need, plus your ingredients (listed below). If not, there are lots of excellent online homebrew stores to choose from.
Plan to allocate three or so hours for your first brew day. A very important thing to remember – don’t stress out as you follow these steps, if you get something wrong, take it in stride. Likely, you didn’t ruin your batch. And if you did, well, stuff happens. Think of it like cooking – most of us don’t bake the best batch of bread ever or make an excellent roast chicken on our first attempt. Relax.
Steeping the Specialty Grains
To start with, fill your pot with three to four gallons of water and heat it on your stove to 150F to 160F. When it reaches temperature, put the black patent, crystal 80 and chocolate malt in the muslin or grain bag and securely tie it closed (see the ingredients above for exact amounts). Dunk it in the hot water, like you would a tea bag.
Once the grain is wet and starts to expand in the bag, just drop it in. Maintain the water at the temp – you may cover your pot, or occasionally add heat. Do not let it rise to 170F – it is better to keep it cooler than too hot (which may cause your beer to be tannic). Steep the grain like this for approximately 30 minutes. Using tongs, a sturdy cooking spoon, or a sieve with a handle, lift the bag of steeping grains out of the wort (liquid) and let the contents drain into the pot. Throw the bag and grains away – they’ve done their job!
Start the Boil and Add Hops
Turn the heat under the pot up and bring the wort to a boil. Watch carefully, you don’t want this to boil over. If your stove has trouble getting it up to boil, you may cover it, but when it begins to boil, remove the lid. Maintain a steady, gently rolling boil.
When your wort is boiling, toss in your hops. Let them boil for 45 minutes (without a lid)
Add Malt Extract and Lactose
After 45 minutes, add the dry malt extract and lactose. Both of these will clump up and form a cement-like substance that will burn on the bottom of your pot if you just dump them in, so don’t do that! Rather, get a large mixing bowl and scoop out some of the boiling wort, then slowly add a portion of the extract and whisk or stir like a mad man until it dissolves. Pour the liquid back into the pot and repeat as needed until you have added all the extract and lactose. You likely will have lost the boil during this procedure, bring it back up to a boil and then let it boil another 15 minutes. Turn off the heat.
Chill the Wort, Sanitize the Fermenter and Top Off
Partially fill your sink with water and ice and put the pot in the ice water to cool. You may need to replenish the ice water from time to time.
Make a batch of sanitizer (Star San or Iodophor) following the directions on the package. Sanitize the thermometer – anything that will be touching the wort at this point forward (post-boil) needs to be sanitized. Take the temperature of the wort – when it has cooled to around 80F, you’re ready for the next step.
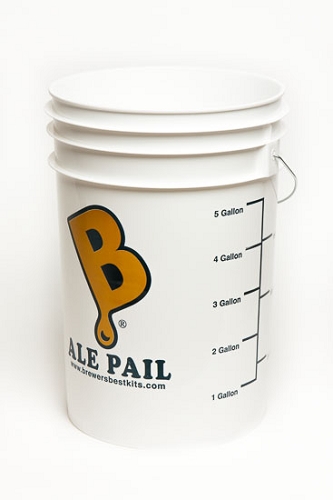
Using the Star San or Iodophor, sanitize your fermenting bucket and pour the wort into the bucket. This recipe calls for a five gallon batch, so now top off the wort with cold water to bring the total wort in the bucket to five gallons – your fermentation bucket will have markings on the side indicating volume. Stir or rock the bucket to mix and add some oxygen to the wort.
Pitch the Yeast and Ferment
Open the yeast packet and pour in, on top of the wort. Sanitize the fermentation bucket’s lid and close it. Fill your airlock with sanitizer and insert in the lid’s grommeted hole. Stash the fermenter somewhere coolish – if you have a space that stays in the mid to low sixties, that’s perfect. If not, wherever is coolest in your home will work. Let it sit for two or three weeks. Resist the temptation to open the lid, nothing good comes from that! Amuse yourself by watching the airlock bubble for a few days, don’t fret if it takes a day or two to start!
Woohoo, You’re Making Beer!
Congratulations, you’ve completed your first brew day – well, after you’ve cleaned up the mess you made! Enjoy a beer and get ready to bottle your beer in three weeks!
Homebrewers use their creativity, building recipes and brewing processes using new or novel ingredients, pushing the boundaries of new flavor profiles. Similarly, those who produce ingredients and products also innovate, using both cutting-edge science and brewing knowledge to create these new ingredients and products for homebrewers.
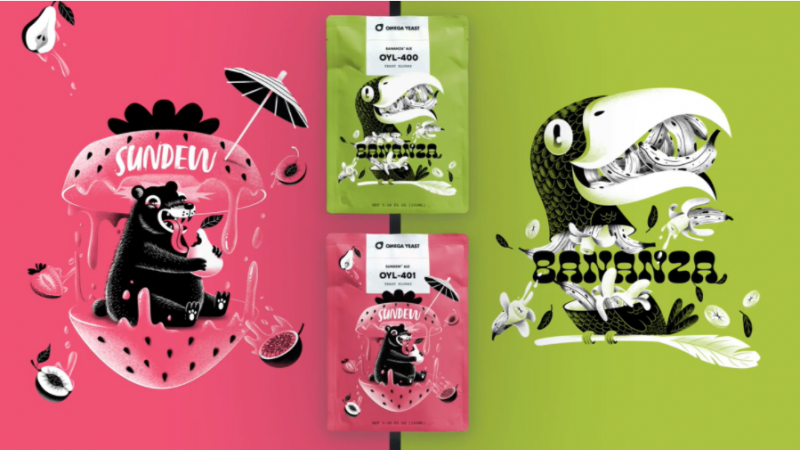
A few months ago, Omega Yeast released two new strains, Bananza and Sundew, both available now to homebrewers, created using CRISPR gene-editing technology. Conversations with brewers interested in pushing the upper limits of esters and fruitiness in their beers led Omega to the create these new strains. Thank you to Omega staff Bianca Alley (Lab Manager), Keith Lacy (Research and Development Lab Technician) and Laura Burns (Director for Research and Development) for visiting with me about these new yeasts and the high tech process of creating them.
Omega Yeast’s POF- Project
When Laura, who earned a Ph.D from Vanderbilt, joined Omega in 2019 to lead the research and development efforts, she pushed ahead with what Omega calls its POF- Project. POF- stands for Phenolic Off Flavor Negative. Phenolic flavors due to brewing yeast, according to Laura, are the result of the work of the yeast’s FDC1 gene. This gene enables an enzyme which in turn produces a compound called 4-vinyl guaiacol (4VG). Most people perceive the 4VG compound as spice and clove phenolic flavors – in beer and other products, like baked goods.
Historically, through selection by brewers, many brewing yeasts developed naturally over time to be phenolic negative. Exceptions include Belgian and German Weizen yeasts, where the spice and clove phenolics eschewed in other styles are seen as positive attributes. These yeasts also developed strong ester characteristics, to compete with the phenolic flavors. It was these esters that sparked the POF- Project.
According to Bianca, Omega was interested in “eliminating phenol flavors produced by these strains so that the ester characteristics can come through, giving way to a new beer character.” The phenolics, Laura said, “tend to mask some of the hoppy character of the beer” as well as other flavor profiles. “In the absence of the phenols,” she continued, “other characteristics are emphasized and come through in new and interesting ways in the final character of the beer.”
CRISPR Gene Editing
Both Laura and one of Omega’s founders, Lance Shaner, previously worked with CRISPR gene editing, in graduate school, so they were well situated to take on this project. According to Laura, the limitations on using CRISPR are not equipment related – the equipment needed is readily available and affordable. What is needed is the knowledge of how to use it, experience, and the perseverance to go through the robust licensing process required for CRISPR created products.
In sum, CRISPR offers scientists a way to find a specific bit of DNA inside a cell and then alter it. CRISPR has been adapted to do other things too, such as turning genes on or off without altering their sequence. Prior to this technology, editing the genomes of some plants and animals was possible, but the process was both prohibitively expensive and took years. Today, CRISPR makes the process of gene editing affordable and available to small companies like Omega.
Already widely used for scientific research, many of our food stuffs have been altered via CRISPR gene editing. CRISPR is also being used to transform medicine, both in the treatment and prevention of diseases.
GMO Yeast?
In the grocery stores, we see many items labeled as Non-GMO, responding to concerns about the long-term environmental and health impacts of industrial farming of genetically engineered plants and animals. These concerns infuse the active conversations and debate about GMO products in scientific, environmental, regulatory and consumer circles.
According to Laura, Omega’s gene-edited yeasts are not best described as GMO. She said “There are no added materials introduced to the yeast, just taken out. We took a minimalist approach so that it was approachable and brewers wouldn’t be hesitant to use the yeast.”
Ramp Up the Fruitiness: Bananza and Sundew
Omega’s POF- Project grew from conversations with professional and homebrewers about wanting yeast that amplify the fruity characteristics of their beers. “We had an ear to what our customers were looking for,” according to Laura, “and some of these strains were obvious choices to offer.”
The first two yeasts released that were produced using CRISPR technology are Bananza and Sundew. Bananza has prominent banana aromas and flavors, much like a hefeweisen yeast, but more pronounced and tropical, because of the lack of competing clove and spice aromas and flavors in the typical hefe yeast. Sundew features strawberry, tropical fruit and stone fruit esters, again amplified by the lack of phenolic characteristics, which combine interestingly with fruity hops.
Laura, Keith and Bianca all brew – Laura did so professionally at two breweries and Keith and Bianca are active homebrewers. “It was kind of surprising how much a little underpitch of Bananza really enhanced the banana flavors,” according to Keith. This is a common technique for homebrewers with Hefeweizen and Belgian yeast strains, but can be tricky – the fermentation character can go from pleasant to a hot mess quickly. But Bananza works well with a slight under pitch, Keith said, “it didn’t produce any weird off flavor and it didn’t struggle to finish up.”
For Sundew, according to Keith, temperature was more key. Fermenting in the low to mid seventies enhanced the ester quality, while still being pleasant and enjoyable.
Both Bianca and Keith brewed multiple batches with these new yeasts, using Brewer’s Friend to craft the recipes, and each generously shared one of their favorite recipes.
With the berry sensory notes that Sundew Ale (OYL-401) produces, it naturally fits many pale, fruity styles. I wanted to see how the yeast pairs with the flavors of a dark beer (dark chocolate, dried fruit, toffee, coffee, and roasty goodness!) and settled on a stout. By design, this recipe sits in the middle of various stout subclasses and with a few simple adjustments can be tailored to the personal tastes of the brewer. For example, mash with less grain at 148°F for higher attenuation and a drier finish to make a dry Irish stout, or increase the amount of oats to 10-20% to make an oatmeal stout.
The higher mash temperature gives body without being overly sweet, the dehusked and debittered Carafa III adds beautiful roasted color without the astringency, and the flaked oats help with a nice stable head. You may substitute Maris Otter for the Golden Promise. Other possible substitutions include honey malt or a medium crystal malt for the Golden Naked Oats (or whatever you prefer – it is your beer!)
First Gold reflects the more traditional English hop character and also adds some fruity character with a touch of spice. The Ariana hop choice brings a higher alpha acid percentage to the recipe, and also lends some blackcurrant notes. When added to the whirlpool, the hops don’t make the beer overly bitter or overpower the other aromas. For a more traditional English take, I’ve always been a fan of East Kent Golding or Fuggles.
Recipe
STATS: Original Gravity: 1.058 Final Gravity: 1.016 ABV: 5.48% IBU: 29 SRM: 38
FERMENTABLES (5 Gallon Batch): 10 lbs: Golden Promise (77%) 1.2 lbs: Chocolate Malt (9.2%) 0.4 lbs: Carafa III (3.1%) 0.7 lbs: Flaked Oats (5.4%) 0.7 lbs: Golden Naked Oats (5.4%)
HOPS: 1 oz: First Gold, Type: Pellet, A.A.: 7.5, Use: Boil for 60 min 1 oz: First Gold, Type: Pellet, A.A.: 7.5, Use: Boil for 5 min 1 oz: Ariana, Type: Pellet, A.A.: 11, Use: Whirlpool
MASH GUIDELINES: Infusion, Temp: 154°F, Time: 60 min Boil for 90 minutes
YEAST OYL-401 Sundew. The temperature range is relatively broad, from 64-78°F. We recommend slight overpitching or a fresh starter for more berry notes. Sundew will shine at fermentation temperatures in the mid-70s.
Even though the boil is 90 minutes, add the first hops at the 60 minute mark. I prefer this method, so that I open a 1 oz packet of hops and dump it into the kettle as opposed to weighing it out or ending up with partial packets lying around.
Sundew Strawberry Puckerade, Fruited Kettle Sour Recipe by Bianca Alley
To highlight the robust strawberry jamminess of Sundew™ Ale (OYL-401), I built a recipe that would complement the Belgian and berry characteristics. Balancing the acidity and fruity berriness presents the key challenge to pairing Sundew with a fruited kettle sour
Using a basic malt bill of 50-50 wheat and 2-row, I chose to do a protein rest that helped to break down the beta-glucans and long protein chains adding to the body and making the lautering a little bit easier.
The finished product pushed fruit forward on the nose, with a nicely tart finish. The flavor profile highlighted a melding of strawberry puree and lemon zest to accentuate the aromatic berry yeast characteristic. A sure thirst quenching crowd-pleaser.
Recipe:
STATS: Original Gravity:1.048 Final Gravity:1.015 Starting pH:5.6 Final pH: 3.18 ABV: 4.3 IBU:4.1 SRM:2.8
SEQUENTIAL FERMENTATION: Knock out at 95°F and allow the lacto to sour for 24 hours. The wort should be sufficiently sour (pH 3.2-3.4), at which point pitch Sundew and dry hop 0.25 oz Tettnang hops. After 1 week (or once fermentation is complete), add strawberry/lemon flavor and leave for an additional 48 hours for refermentation prior to kegging.
YEAST: OYL-401 Sundew. The temperature range is relatively broad, from 64-78°F. We recommend a slight overpitch or a fresh starter for more berry notes. Sundew will shine at fermentation temperatures in the mid-70s.
LACTIC ACID BACTERIA: OYL-605 Lacto. Blend of Lactobacillus plantarum and brevis. Sours across a broad temperature range.
Today, we’re taking a deep dive into a seasonal style – the traditional Maibock, now called the Helles Bock in the latest BJCP style guidelines. Seasonal brewing with beers like the Helles Bock can be great fun, as homebrewers establish their own traditions or follow historical patterns that may be hundreds of years old.
History
The Helles Bock fits into a traditional calendar of German bock brewing – the traditional or Dunkel Bock brewed for the winter, the Doppelbock for Lent (to provide sustenance during fasting) or early spring, and the Helles Bock for May and the lead into summer. It fits neatly into a season that is post-doppelbock but pre-autumn festbiers.
The history of the Helles Bock is also tied into the broad movement of German brewing from darker to lighter beers, with the advent and growing popularity of pale malts in the early 19th century.
Before then, German beers, including bocks, were brown or dark. First developed in England, pale malting came about when kilning by burning wood was replaced with coke. The Germans were not quick to embrace the new pale malts – the locals loved their brown beers, including bocks. Using the new pale malts, brewers in Pilsen, Bohemia, developed the pale style that eventually came to rule the world – the Pilsner. Eventually, its popularity led German brewers to adapt, leading to the development of many pale styles we now equate with German lagers – Helles, Festbiers, German Pilsners, Dortmunders and the Helles Bock.
Perhaps not coincidentally, at the same time pale beer arose, the popularity of clear glassware for drinking grew, replacing the ubiquitous pottery, ceramic, metal or wooden drinking tankards. Now those pretty pale beers could be shown off!
For the Helles Bock in particular, it is anecdotally accepted that the style began at Munich’s Hofbrau, starting in the 1600s. At that time, the royal household were not entirely pleased with the offerings from Hofbrau and desired beers brewed in the style being popularized in Einbeck – Bocks. Later, with the advent of the pale malts, Hofbrau made their bock more pale and hoppier, leading to what we now think of as the Maibock or Helles Bock.
Style Characteristics
Today, the Helles Bock is a beer of some strength, generally pale ranging from golden to a light amber. As a style, it can be thought of as sitting between the Dunkels Bock and the Munich Helles or Festbier. It is a big, strong malty lager like the Dunkels Bock, but paler and with less rich malt character and more balanced, by bitterness and dryness. Compared to the Helles or Festbiers, it is maltier and stronger.
Maltiness is moderate to strong in this style, both in aroma and flavor. It can have some Maillard-type character, but shouldn’t be caramelly or have any dark fruit character, unlike the Dunkels Bock. While still malt-forward, it gives the perception of more balance than the traditional bock because of its well-attenuated nature and elevated bitterness.
Like most lagers, it has a ‘clean’ fermentation character, without perceivable esters or phenolics. Some fruitiness from Munich malt is sometimes present in this style, but that isn’t from fermentation, whose character should be clean.
In addition to a clean fermentation, this style depends upon a fuller attenuated fermentation than the traditional bock. This should not be a sweet beer, but have a mostly dry finish.
Mouthfeel is important for the style. It needs a medium body to impart a sense of fullness that is a part of our enjoyment of bocks. It also needs to have solid carbonation, up to medium high carbonation – this carbonation couples with the attenuation and bitterness to make this a more ‘drinkable’ version of the bock. A light alcohol warming also enhances our enjoyment of this style – but it should never be hot or fusel.
As with all German lagers, any discussion of the Helles Bock soon becomes a conversation about whether to decoct or not. The bottom-line is that people make an excellent Helles Bock both ways. One way to approach it is as an interesting experiment – perhaps do a simple version of a decoction, a single decoction, and see how challenging you find it for your brewing process and set up. Or if you’re already an experienced decoction brewer, do a three or four decoction mash and see how much complexity you can pull out of the simple grain bill.
Without a decoction mash, some brewers use melanoidin malt to mimic the flavors produced by decoction. If you do this, show restraint, too much melanoidin can make the beer sweet and too dark for this style – Brewer’s Friend can help you track the color and the percentage, which should be no more than 5% of the grain bill.
Otherwise, specialty grains are generally not used in the Helles Bock. Brewers adjust the percentages of three base grains, typically – Pilsner, Munich and Vienna – to get the flavor, aroma and color profile they are looking for.
While still malt forward, the Helles Bock does need a firmer bitterness than the traditional bock. Hops are usually German noble hops, often Hallertau Mittelfruh, although you can certainly use hops from other areas whose parentage traces from the noble hop category – like American-grown Liberty, Mt. Hood or Sterling.
As with all lagers, yeast and fermentation are critical to the Helles Bock. Choose a clean, well-attenuating and flocculating yeast that will enhance malt character. White Labs Bock Lager and Southern German Lager strains are good choices. Omega’s Bock Lager and Wyeast’s Munich Lager and Hella Bock strains are also excellent choices. Dry yeast options are also available – Lallemande’s Lalbrew Diamond and Fermentis’ Saflager W-34/70.
Pitching sufficient amounts of healthy yeast is important to producing clean, well-attenuated lagers. Generally, pitch rates for lagers are higher than for ales, and because the Helles Bock is a bigger beer, it needs an even higher pitch rate. Use the pitching calculator at Brewer’s Friend to make sure you’re pitching enough yeast.
You can pitch multiple packs of yeast, but that can get expensive fast. You can also make a starter, for a beer like the Helles Bock, it will need to be a big starter and probably will need to be stepped up twice. For beers like this, I will sometimes do a three-gallon extract batch with no hops, pitch two packs of lager yeast, let it ferment out for ten to twelve days at 50F, then pour off the ‘beer’ and pitch the remaining yeast cake into the lager. For me, this is often easier than a multiple step starter that ends up still not being big enough.
Generally, lagers require fermentation temperature control. Standard practice is to ferment at 50F. My practice is to chill wort to below 50F, pitch the yeast, let it rise to 50F and then ferment there for ten to twelve days, finally raising the temp to 65F. This can serve as a diacetyl rest, although I find that if I pitch sufficient amounts of healthy yeast at the right temps, diacetyl is usually not a problem. But raising the temp does encourage the yeast to finish up their job and get the final bit of attenuation
After fermentation, I drop the temperature to 34F and lager it for at least two weeks. I carb at that temperature, too, and storing it in a cold keg in a fridge or keezer is also like lagering, so often the beer will have lagered for about a month before getting served.
Double Decoction, steps at 142F, 152F and 158F Batch Sparge Water – Chicago municipal water (Lake Michigan), target mash pH 5.3, with 13 ml of lactic acid
Hop Schedule
2 oz Hallertau Mittelfruh 3.7AA @ 60 minutes 1 oz Hallertau Mittelfruh @ 30 minutes 1 oz Hallertau Mittelfruh @10 minutes
Yeast
Omega Bock Lager or other yeasts mentioned above
Other
Whirlfloc added with ten minutes left in the boil, White Labs Clarity Ferm pitched with the yeast
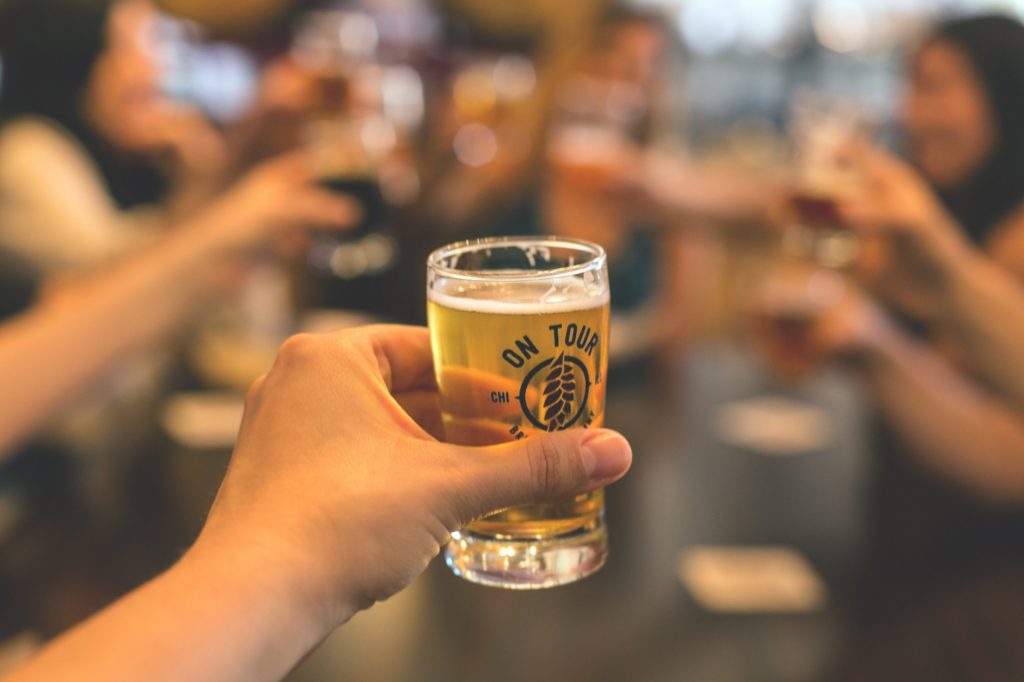
Commercial Helles Bocks – On Tour’s Low Boy
As a style, the Helles Bock hasn’t been as commercially popular here among craft beer brewers, compared to the traditional Dunkels Bock or even the Doppelbock. The most popular commercial Maibock in this country isn’t a lager – its Rogue’s Dead Guy, which Rogue describes as a Maibock Ale. Compared to its German counterparts, Dead Guy has more toffee and caramel aromas and flavors. That being said, its both popular and award-winning.
One of my favorite German Maibocks is from Ayinger. I’ve never had it fresh, from the source, but the imported bottles I’ve had have been delicious.
A group of us spoke with Dave Campbell, brewer at On Tour, at a Helles Bock tasting featuring Low Boy. Some highlights from that conversation include:
Grain Bill – in addition to Pilsner and Munich, On Tour uses rye malt in Low Boy, along with melanoidin, cara-amber, and a touch of caramel malt
Water – On Tour uses Lake Michigan water, and does small adjustments with calcium chloride, calcium sulfite, and phosphoric acid
Hops – Columbus for bittering and Czech Saaz at the end, in the last ten minutes
Yeast – BSI Andechs strain, originally from a monastery brewery outside Munich, 72% attenuation and strong flocculation
Fermentation – starts at 53F, let rise to 55F over the first couple of days, halfway through fermentation raise it to 60, then slowly drop to lagering temps; four weeks total for fermentation and lagering
According to Campbell, On Tour brews Low Boy seasonally, in late winter, to be served in the spring. It’s a beer they are known for, because of the medal, but he called it a “taproom hero”, meaning that people come to the taproom for a ten ounce pour, but then switch to drinking their popular and more crushable IPAs and other offerings.
Whether drinking a commercial offering like Low Boy or your own handcrafted Helles Bock, enjoy this sure sign of spring as we leave the doldrums of winter. Prost!
This spring, the Brewer’s Friend blog is rebooting, to augment the resources and tools the site offers homebrewers.
We will be posting new content for brewers weekly. Initially, our content will focus on six areas:
Styles – an indepth look at a particular style, including one or two recipes
Ingredients – a look at hops, malts, yeast, and water
Beginning brewing advice, tips and equipment
Advanced brewing advice, tips and equipment
Interviews with brewers and experts
Brewing as a hobby – homebrew clubs, events, competitions, stories
Check back soon for an article on a seasonal style – the Helles Bock or Maibock, traditionally drunk in May, fitting in the old German brewing calendar between the Doppelbocks of early spring and the Fest beers of autumn.
I serve as editor and writer for the blog. From Chicago, I brew with the CHAOS homebrew club, am a BJCP National and Cider judge, an assistant representative for the BJCP in its midwest region, have taught about homebrewing at the City Colleges of Chicago and regularly lead tastings, off-flavor, pairings and other brewing-related workshops. I enter competitions and, like most brewers, sometimes earn a medal and sometimes don’t. I love the community of homebrewers, it is a great hobby!
If you have ideas for articles, or any feedback, please contact me at editor@brewersfriend.com Would love to hear from you as the blog develops over the coming months.