Ingredients - Brewer's Friend
Brew your best beer EVER. Save 10% on Brewer's Friend Premium today. Use code TAKE10. Sign Up ×

Archive for the ‘Ingredients’ Category

Ingredient Series: Gene-Edited Beer Yeast

Thursday, May 13th, 2021

by Jim Vondracek

Homebrewers use their creativity, building recipes and brewing processes using new or novel ingredients, pushing the boundaries of new flavor profiles. Similarly, those who produce ingredients and products also innovate, using both cutting-edge science and brewing knowledge to create these new ingredients and products for homebrewers.

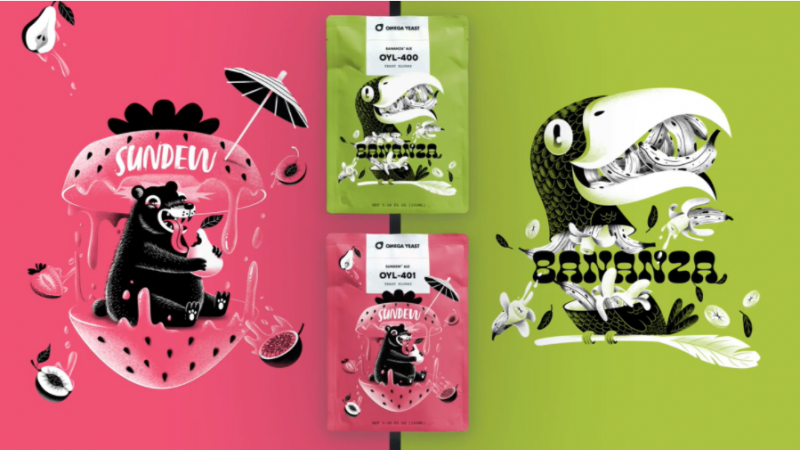
A few months ago, Omega Yeast released two new strains, Bananza and Sundew, both available now to homebrewers, created using CRISPR gene-editing technology. Conversations with brewers interested in pushing the upper limits of esters and fruitiness in their beers led Omega to the create these new strains. Thank you to Omega staff Bianca Alley (Lab Manager), Keith Lacy (Research and Development Lab Technician) and Laura Burns (Director for Research and Development) for visiting with me about these new yeasts and the high tech process of creating them.

Omega Yeast’s POF- Project

When Laura, who earned a Ph.D from Vanderbilt, joined Omega in 2019 to lead the research and development efforts, she pushed ahead with what Omega calls its POF- Project. POF- stands for Phenolic Off Flavor Negative. Phenolic flavors due to brewing yeast, according to Laura, are the result of the work of the yeast’s FDC1 gene. This gene enables an enzyme which in turn produces a compound called 4-vinyl guaiacol (4VG). Most people perceive the 4VG compound as spice and clove phenolic flavors – in beer and other products, like baked goods.

Historically, through selection by brewers, many brewing yeasts developed naturally over time to be phenolic negative. Exceptions include Belgian and German Weizen yeasts, where the spice and clove phenolics eschewed in other styles are seen as positive attributes. These yeasts also developed strong ester characteristics, to compete with the phenolic flavors. It was these esters that sparked the POF- Project.

According to Bianca, Omega was interested in “eliminating phenol flavors produced by these strains so that the ester characteristics can come through, giving way to a new beer character.” The phenolics, Laura said, “tend to mask some of the hoppy character of the beer” as well as other flavor profiles. “In the absence of the phenols,” she continued, “other characteristics are emphasized and come through in new and interesting ways in the final character of the beer.”

CRISPR Gene Editing

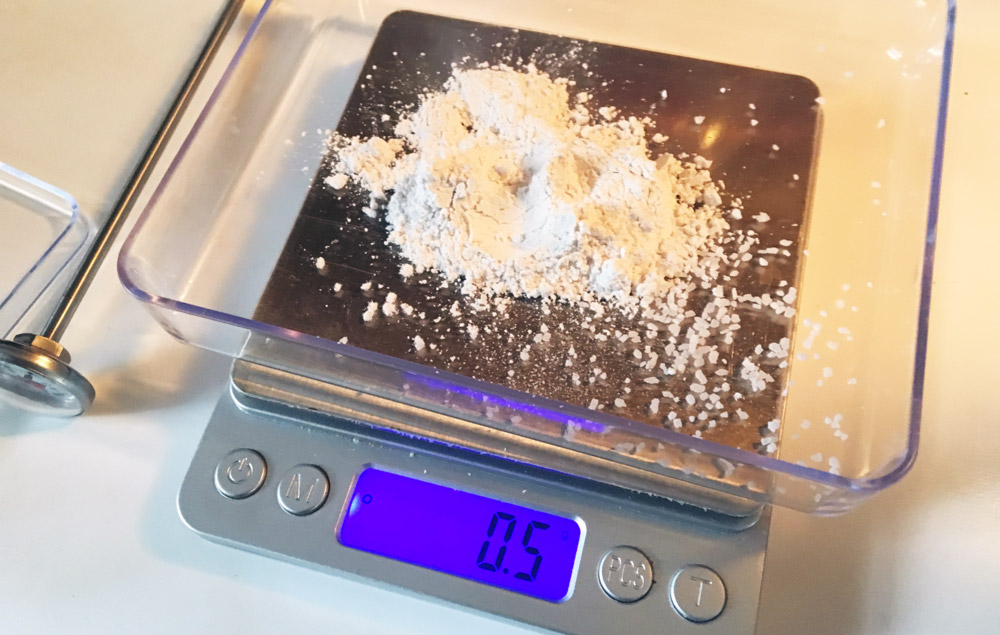
Both Laura and one of Omega’s founders, Lance Shaner, previously worked with CRISPR gene editing, in graduate school, so they were well situated to take on this project. According to Laura, the limitations on using CRISPR are not equipment related – the equipment needed is readily available and affordable. What is needed is the knowledge of how to use it, experience, and the perseverance to go through the robust licensing process required for CRISPR created products.

In sum, CRISPR offers scientists a way to find a specific bit of DNA inside a cell and then alter it. CRISPR has been adapted to do other things too, such as turning genes on or off without altering their sequence. Prior to this technology, editing the genomes of some plants and animals was possible, but the process was both prohibitively expensive and took years. Today, CRISPR makes the process of gene editing affordable and available to small companies like Omega.

Already widely used for scientific research, many of our food stuffs have been altered via CRISPR gene editing. CRISPR is also being used to transform medicine, both in the treatment and prevention of diseases.

GMO Yeast?

In the grocery stores, we see many items labeled as Non-GMO, responding to concerns about the long-term environmental and health impacts of industrial farming of genetically engineered plants and animals. These concerns infuse the active conversations and debate about GMO products in scientific, environmental, regulatory and consumer circles.

According to Laura, Omega’s gene-edited yeasts are not best described as GMO. She said “There are no added materials introduced to the yeast, just taken out. We took a minimalist approach so that it was approachable and brewers wouldn’t be hesitant to use the yeast.”

Ramp Up the Fruitiness: Bananza and Sundew

Omega’s POF- Project grew from conversations with professional and homebrewers about wanting yeast that amplify the fruity characteristics of their beers. “We had an ear to what our customers were looking for,” according to Laura, “and some of these strains were obvious choices to offer.”

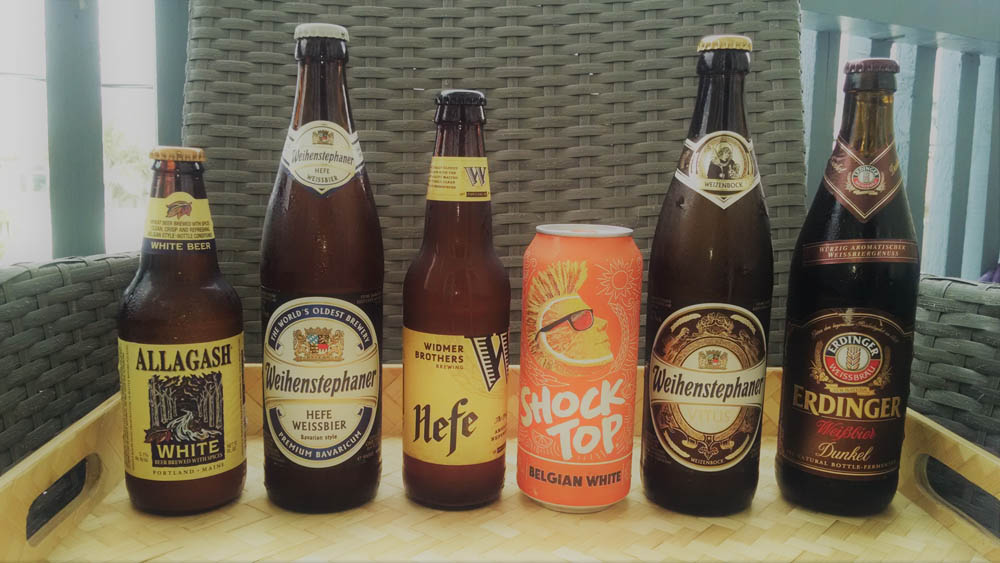
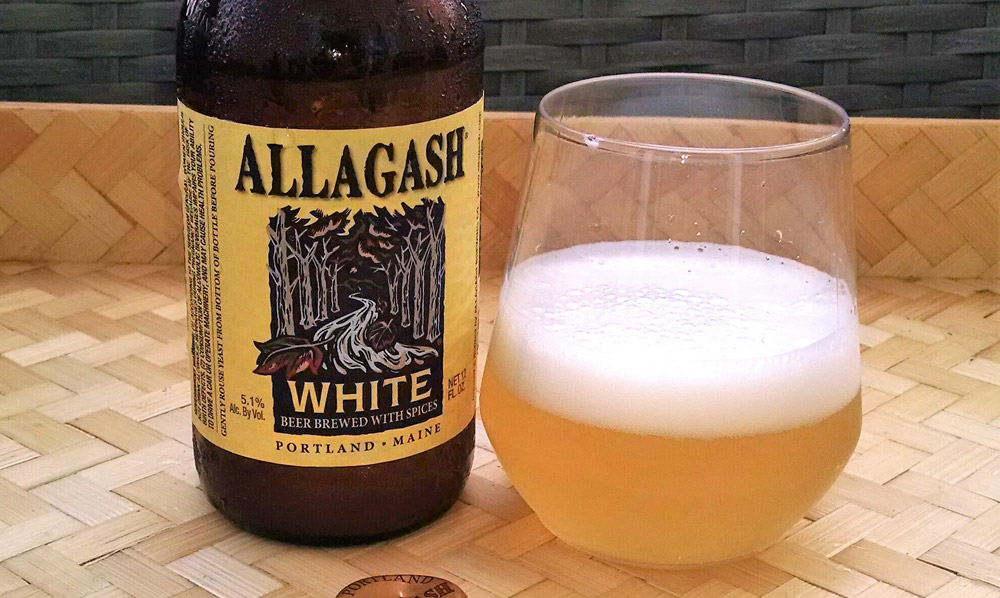
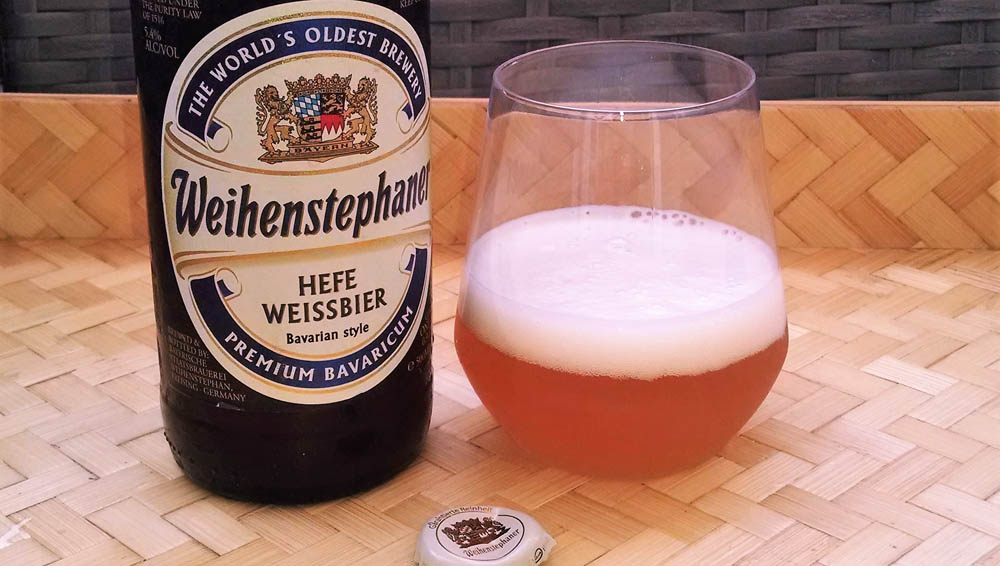
The first two yeasts released that were produced using CRISPR technology are Bananza and Sundew. Bananza has prominent banana aromas and flavors, much like a hefeweisen yeast, but more pronounced and tropical, because of the lack of competing clove and spice aromas and flavors in the typical hefe yeast. Sundew features strawberry, tropical fruit and stone fruit esters, again amplified by the lack of phenolic characteristics, which combine interestingly with fruity hops.

Laura, Keith and Bianca all brew – Laura did so professionally at two breweries and Keith and Bianca are active homebrewers. “It was kind of surprising how much a little underpitch of Bananza really enhanced the banana flavors,” according to Keith. This is a common technique for homebrewers with Hefeweizen and Belgian yeast strains, but can be tricky – the fermentation character can go from pleasant to a hot mess quickly. But Bananza works well with a slight under pitch, Keith said, “it didn’t produce any weird off flavor and it didn’t struggle to finish up.”

For Sundew, according to Keith, temperature was more key. Fermenting in the low to mid seventies enhanced the ester quality, while still being pleasant and enjoyable.

Both Bianca and Keith brewed multiple batches with these new yeasts, using Brewer’s Friend to craft the recipes, and each generously shared one of their favorite recipes.

Sundew Stout Recipe by Keith Lacy

Sundew Stout Recipe in Brewer’s Friend

With the berry sensory notes that Sundew Ale (OYL-401) produces, it naturally fits many pale, fruity styles. I wanted to see how the yeast pairs with the flavors of a dark beer (dark chocolate, dried fruit, toffee, coffee, and roasty goodness!) and settled on a stout. By design, this recipe sits in the middle of various stout subclasses and with a few simple adjustments can be tailored to the personal tastes of the brewer. For example, mash with less grain at 148°F for higher attenuation and a drier finish to make a dry Irish stout, or increase the amount of oats to 10-20% to make an oatmeal stout.

The higher mash temperature gives body without being overly sweet, the dehusked and debittered Carafa III adds beautiful roasted color without the astringency, and the flaked oats help with a nice stable head. You may substitute Maris Otter for the Golden Promise. Other possible substitutions include honey malt or a medium crystal malt for the Golden Naked Oats (or whatever you prefer – it is your beer!)

First Gold reflects the more traditional English hop character and also adds some fruity character with a touch of spice. The Ariana hop choice brings a higher alpha acid percentage to the recipe, and also lends some blackcurrant notes. When added to the whirlpool, the hops don’t make the beer overly bitter or overpower the other aromas. For a more traditional English take, I’ve always been a fan of East Kent Golding or Fuggles.

Recipe

STATS:
Original Gravity: 1.058
Final Gravity: 1.016
ABV: 5.48%
IBU: 29
SRM: 38

FERMENTABLES (5 Gallon Batch):
10 lbs: Golden Promise (77%)
1.2 lbs: Chocolate Malt (9.2%)
0.4 lbs: Carafa III (3.1%)
0.7 lbs: Flaked Oats (5.4%)
0.7 lbs: Golden Naked Oats (5.4%)

HOPS:
1 oz: First Gold, Type: Pellet, A.A.: 7.5, Use: Boil for 60 min
1 oz: First Gold, Type: Pellet, A.A.: 7.5, Use: Boil for 5 min
1 oz: Ariana, Type: Pellet, A.A.: 11, Use: Whirlpool

MASH GUIDELINES:
Infusion, Temp: 154°F, Time: 60 min
Boil for 90 minutes

YEAST
OYL-401 Sundew. The temperature range is relatively broad, from 64-78°F. We recommend slight overpitching or a fresh starter for more berry notes. Sundew will shine at fermentation temperatures in the mid-70s.

Even though the boil is 90 minutes, add the first hops at the 60 minute mark. I prefer this method, so that I open a 1 oz packet of hops and dump it into the kettle as opposed to weighing it out or ending up with partial packets lying around.

Sundew Strawberry Puckerade, Fruited Kettle Sour Recipe by Bianca Alley

Sundew Strawberry Puckerade in Brewer’s Friend.

To highlight the robust strawberry jamminess of Sundew™ Ale (OYL-401), I built a recipe that would complement the Belgian and berry characteristics. Balancing the acidity and fruity berriness presents the key challenge to pairing Sundew with a fruited kettle sour

Using a basic malt bill of 50-50 wheat and 2-row, I chose to do a protein rest that helped to break down the beta-glucans and long protein chains adding to the body and making the lautering a little bit easier.

The finished product pushed fruit forward on the nose, with a nicely tart finish. The flavor profile highlighted a melding of strawberry puree and lemon zest to accentuate the aromatic berry yeast characteristic. A sure thirst quenching crowd-pleaser.

Recipe:

STATS:
Original Gravity:1.048
Final Gravity:1.015
Starting pH:5.6
Final pH: 3.18
ABV: 4.3
IBU:4.1
SRM:2.8

MALT (five gallon batch):
7 lbs 2-row
6 lbs White wheat

HOPS:
0.25 oz Tettnang (A.A. 4.3) dry hop after lactic acid production

FLAVORING ADDITIONS:
8 oz Vintners Harvest Strawberry Puree
2 lemon peels steeped in 0.5 liter of 212℉ of hot water

MASH:
Protein Rest: 122℉, 35 minutes
Saccharification: 148℉, 45 minutes
Mash Out: 168℉, 10 minutes

Boil for 20 minutes

SEQUENTIAL FERMENTATION:
Knock out at 95°F and allow the lacto to sour for 24 hours. The wort should be sufficiently sour (pH 3.2-3.4), at which point pitch Sundew and dry hop 0.25 oz Tettnang hops. After 1 week (or once fermentation is complete), add strawberry/lemon flavor and leave for an additional 48 hours for refermentation prior to kegging.

YEAST:
OYL-401 Sundew. The temperature range is relatively broad, from 64-78°F. We recommend a slight overpitch or a fresh starter for more berry notes. Sundew will shine at fermentation temperatures in the mid-70s.

LACTIC ACID BACTERIA:
OYL-605 Lacto. Blend of Lactobacillus plantarum and brevis. Sours across a broad temperature range.


Priming Sugar 101: How To, How Much, and When To Use?

Thursday, September 24th, 2020

by Chris Cook

Congratulations. You nailed your brew day, you’ve made it through what probably felt like several long weeks of fermentation, and your precious wort is now precious beer. Now just one step remains between you and a cold, bubbly glass of homebrew: Priming.

What is Priming?

Without priming, the beer a homebrewer has invested so much time, energy and money into will pour flat and lifeless. Proper priming gives beer its trademark carbonation and foamy head and can significantly benefit aroma, taste, mouthfeel and overall appearance. Priming is essentially the home stretch of the marathon that is homebrewing, but luckily it’s a simple process that’s made even easier by the wealth of equipment and resources available to homebrewers today.

Newcomers to homebrewing likely prime their beer directly in the bottle. This process, known as bottle priming, involves mixing dissolved sugar with beer, transferring it to bottles, and securing those bottles with an air-tight seal. Yeast leftover in the beer from fermentation eats away at that added sugar in the bottle and produces carbon dioxide gas, which remains in the beer until it’s ready to pour. It’s the same process that produces the air bubbles in an airlock during fermentation. The difference is that during bottle priming, homebrewers want to trap that CO2 gas in the bottles to create carbonation.

There are several “must-have” pieces of equipment a homebrewer needs to bottle prime, including a bottling bucket with a spigot, food-grade tubing, a siphon or racking cane, and a bottling wand (spring-loaded is best). However, the most important aspect of the process is sugar. 

How much sugar, what type, and how it’s added to the beer can all impact the final product that comes out of the bottle. Fortunately, the Brewer’s Friend Beer Priming Calculator makes it easy for homebrewers both novice and veteran to dial in the priming of any brew. Simply enter the volume of beer to be bottled, the desired volumes of CO2 (more on that shortly) and the temperature of the beer being bottled. The calculator will then give an exact measurement of how much priming sugar to use.

However, before getting started, there are a few things every homebrewer should be mindful of when it comes to bottle priming. First, there is a very real danger of creating infamous “bottle bombs.” These are exactly what they sound like – bottles of beer turned into explosives by excess pressure produced from the priming process. Remember that the point of bottle-priming is to trap CO2 gas inside the bottle. However, a standard beer bottle has a limit on how much pressure it can contain before it explodes, which is why it is of utmost importance to use the proper amount of priming sugar AND use proper sanitation practices to avoid introducing unpredictable bacteria and wild yeast to the beer. You also want to ensure that the fermentation is actually complete and not just stalled.

As scary as bottle bombs may sound, they can be easily avoided by adhering to several familiar principles all homebrewers should follow: proper sanitation, careful handling of the beer, and attention to detail. 

How Much Priming Sugar Do I Need?

With bottle priming, the first choice a homebrewer encounters is how carbonated he or she wants their beer to be. That carbonation is measured in “volumes of CO2,” which vary by style and taste. Most beers will fall between 2.0-3.0 volumes, which conveniently is the amount most standard beer bottles can hold. For reference, the Brewer’s Friend Beer Priming Calculator lists a number of beer styles and their appropriate ranges of carbonation.

The next decision regards what type of sugar to use to prime the beer. Different sugars will impact the final product in various ways, from the negligible impression of common table sugar to other options such as dried malt extract (DME), honey and candy syrup, which leave trace characteristics and take longer to carbonate. Table sugar and corn sugar are the most common products used because of their neutrality, availability, simplicity to handle, and the quickness in which they finish up. Beginners should stick to one of those until they have nailed their bottle-priming process, though the Brewer’s Friend Beer Priming Calculator will be ready and waiting with calculations for each type of priming sugar when homebrewers decide to experiment. 

The last variable is how a homebrewer introduces priming sugar to the beer. The tried-and-true method is to dissolve the chosen sugar in boiling water, cool it down to approximately 80 degrees, and pour it into the bottling bucket. From there, the beer is carefully transferred from the fermenter to the bottling bucket where it mixes with the sugar solution. Splashing can lead to dreaded oxidation, so take care to transfer slowly (auto-siphons help tremendously).

Once the beer and priming sugar have been mixed in the bottling bucket, the beer is ready to be bottled, capped, and stored. Most table sugar-primed beers take 2-3 weeks to fully carbonate if stored between 65-70 degrees. However, it’s always a good idea to test the carbonation by refrigerating and testing one bottle at two weeks, another at three weeks and so on, until the carbonation levels off. 

Note that while bottle priming is a process most common for beginners (compared to kegging), it is by no means unique to newcomers to the hobby. Many lifelong homebrewers, and many breweries at that, still bottle prime and bottle condition their beer because of the unique characteristics it can, and how much easier and cost-effective it is compared to kegging. Any homebrewer that can properly bottle prime his or her brews will never be in short supply of consumables for themselves and their fellow beer-lovers.


How to Use Chocolate in Your Beer

Thursday, April 9th, 2020

By Jesse Southard

Personally, I love chocolate beers. Before I was a homebrewer, I took a trip to the Czech Republic and had my fair share of beer. However, a chocolate beer stood out to me called Opat Chocolate Stout. I remember thinking how did they get so much chocolate flavor into this beer? Anyway, looking back I laugh because adding chocolate to your beer, in my opinion, is one of the easiest ways to elevate your beer’s flavor. You can bring out more chocolate flavors in a base recipe or build a recipe around chocolate. Either way, you need to have some basic knowledge on how to use chocolate in beer, what type of chocolate to use, and some tips on how to get the flavors right. The end goal is to have a chocolaty beer without the beer tasting artificial. So, my advice is to always use whole ingredients such as cocoa nibs, 100% cocoa powder, or pure chocolate extract. Let’s dig a little deeper.

Using Cocoa Nibs In Your Beer

cocoa nibs

Cocoa nibs are the closest thing you will find to the raw cocoa bean outside of the tropical regions that it is grown. The bean is harvested, fermented, and crushed to produce a raw cocoa nib. The nibs are then either packed for sale as a raw item or slightly roasted to produce a richer chocolate flavor. At any rate, if you buy raw or roasted you should taste the product before brewing with it to ensure it has the flavor you are looking for. If you are wanting control of the chocolate flavor, buy the raw nibs and roast them in your oven at home. You can accomplish this by setting your oven at 350 degrees Fahrenheit (177 degrees Celsius), then laying the nibs on a baking sheet and roasting them at five-minute intervals until they have reached the flavor you are looking for. If you fail to roast raw nibs before adding them to your beer, they will impart little-t0-know chocolate flavor. You can use cocoa nibs in any step in the brewing process.

In The Mash

If using cocoa nibs in the mash, you should crush the nibs as you would crush your grains and add them in with the rest of your grain bill. Adding to the nibs to the mash will extract a more bitter dark chocolate flavor which is preferred in more robust stouts and porters.

In the Boil

You can add the cocoa nibs to the boil which will also extract a more bitter dark chocolate flavor. When adding to the boil, I suggest pitching them into a hop spider so you can strain them after the boil.

Primary & Secondary

You can add them to your primary or secondary by first soaking them in vodka overnight. Pitching earlier in fermentation allows for more flavor extraction. Pitching in primary provides a more mellow dark chocolate flavor which is preferred in porters and brown ales. Pitching in secondary will produce a more subtle chocolate undertone which can be experimented with in nontraditional ways.

Using 100% Cocoa Powder In Your Beer

Cocoa powder is a more refined version of cocoa nibs. It has already been roasted to the manufacturer’s specifications and milled into a fine powder. You have no control over the roast factor; however, cocoa powder is a great way to get chocolate flavor into your beer. I do caution about using only 100% cocoa powder as anything else will have fillers, fats, evaporated milk, or other unnatural ingredients. 100% cocoa powder, in my opinion, is the most convenient cocoa product because it is sold in nearly all big box stores and is relatively inexpensive.

Using cocoa powder in your beer is fairly easy as you can add it at any stage to achieve your desired results.

In the Mash

You can add cocoa powder directly to the top of your grain bed when mashing or sparging. You do not want to mix this in when you dough in unless you enjoy having a stuck sparge. When you are finished doughing in, wait 15 minutes and sprinkle your desired amount of cocoa on top of the mash. Adding to the mash allows the chocolate flavor to be extracted while leaving the powder behind when lautering. You can achieve a more subtle chocolate flavor by adding it to the top of the grain bed when fly sparging. If you batch sparge, you can achieve the same effect by adding the cocoa after adding your sparge water. Both methods work perfectly for use in stouts, porters, brown ales, and out of style experiments.

During the Boil

You can add cocoa powder directly to the boil, any time during the boil, or at flame out. Adding at these times, gives you the same result in my experience. Adding cocoa to the boil provides a darker bitter chocolate flavor which is desirable in robust stouts and porters. If adding to the boil, leave the black sludge behind when transferring to the fermentation vessel.

Primary & Secondary

You can also add cocoa powder directly to primary or secondary. To keep things sanitized, you will want to make a vodka cocoa slurry by mixing cocoa powder in vodka. Just like cocoa nibs, adding cocoa powder in primary provides a more mellow dark chocolate flavor which is preferred in porters and brown ales. Pitching in secondary will produce a more subtle mellow chocolate undertone which can be experimented with in nontraditional ways.

Using Chocolate Extract In Your Beer

chocolate extract bottle

The simplest way to add chocolate flavor is by adding a chocolate extract. Now, there are plenty of chocolate-flavored extracts on the market, but we do not want to end up with an artificial tasting beer. So, do yourself a favor and ensure you are using pure chocolate extract. Unlike using cocoa nibs or cocoa powder, extract needs no contact time to achieve the chocolate flavor you want. However, it will impart an alcohol flavor that may be detectable in lighter beers. You can make your own extract at home with cocoa nibs and distilled spirits. A simple extract can be made by adding 6 ounces vodka and 3 ounces of cocoa nibs. Let them soak for a week and then straining off the nibs. You can get quite creative with cocoa nib roast time, extraction time, and type of distilled spirit. I personally like to soak my nibs in bourbon when making chocolate stouts.

To use pure chocolate extract in beer you will want to add it any time after the boil. However, since this product needs no contact time to extract the flavor, you can easily add too much. So, I prefer to add extract at packaging. When adding at packaging, you want to minimize oxygen exposure so you can rack off a few cups of beer to experiment with before adding the extract to your brew. I add drops of extract from an eyedropper to each glass, starting with three and going up three with each glass. You can experiment with more or less extract in each glass, just remember how many drops you added to reach your desired result. If you are adding extract to a five-gallon batch there are 80 cups in a gallon, so if you like nine drops of extract in a cup, you will need to add 720 drops of extract (9×80=720). According to Traditional Oven, there are 98.5 drops in one teaspoon, which means you would add just shy of 7.5 teaspoons (720/98.5=7.3) of extract to a five-gallon batch of beer.

Chocolate is a sweet treat that can be enjoyed in many ways; however, there is nothing like having a nice chocolate beer, especially one that you made yourself. It can be a nice compliment to freshly baked cookies, campfire smores, or even as a dessert beer. Whether you are chasing after that one chocolate beer of your dreams, or just want to experiment with chocolate, I hope that this article helps you in your homebrewing endeavors. Cheers!

Recipe Spotlight

Bill’s Double Chocolate Milk Stout is a great way to test the waters with several of these chocolate-flavor producing methods.


6 Hops That Can Make an Impact Next Brew Day

Tuesday, March 3rd, 2020

By: Ryan Celia

Hops are 1 of 4 ingredients required to brew beer according to traditional German Reinheitsgebot. They impart bitterness, flavor, and aroma to beer when used during specific times before, during, and after the boil. Hops come in several forms, the most common being whole leaf hops, pellet hops, cryo hops, and hop extract. Here are 6 hops that can make an impact on your beer on your next brew day.

Everyday Hophead Hops

Photo by Missy Fant on Unsplash

These are the hops that every hophead uses on a regular basis. These hops are readily available online and at your Local Homebrew Store. You’ll also be able to find them in a variety of forms, not just standard pellets.

Simcoe Hops

Simcoe hops are very popular among professional and home brewers due to them being very well rounded and predictable. Simcoe hops usually range from 12% – 14% alpha acid and work well for a bittering addition as well as a flavor and an aroma addition, making them a triple purpose hop. Not all high alpha acid hops work well as a bittering hop. Some high alpha hops don’t have the clean or desired bittering profile needed to add them early in the boil. Simcoe hops work well in a SMASH beer due to their high alpha acid content that works well for bittering and their exceptional ability to provide their flavor and aroma as advertised. A SMASH beer is a beer brewed with a Single Malt And Single Hop. Simcoe hops are known to impart flavors and aromas of grapefruit, pine, and citrus. Simcoe hops can be found in a wide variety of beer styles but are typically found in IPAs, Double IPAs, American Pale Ales, Wheat beers and Amber Ales.

Citra Hops

Citra hops are in high demand among professional and home brewers due to their incredible ability to add highly desirable flavor and aroma. Citra hops are known for imparting aromas of grapefruit, citrus, and tropical fruit. Citra hops typically have an alpha acid range of 10% – 15%, however, they are one of those hops that the higher alpha acid doesn’t necessarily translate into being a great bittering hop. The bitterness they produce tends to be a bit harsh for some people’s likings. Citra hops make their magic happen when added towards the end of the boil, the whirlpool, and as a dry hop addition. I’ve had and enjoyed several all Citra hopped beers, but the common thread was that the bitterness of these beers was quite restrained. Citra hops can typically be fund in IPAs, Double IPAs, American Ales in general, and New England IPAs.

Mosaic Hops

Mosaic hops are another high demand hop that can be considered a triple purpose hop. They continue to grow in popularity. Their alpha acid range is typically 11% – 14%. Mosaic hops typically impart flavor and aromas of tropical fruit, pine, citrus, and blueberry. Mosaic hops can be found in New England IPAs, American Pale Ales, IPAs, and Double IPAs. I’ve had a few beers that were dominated by Mosaic hops and the blueberry flavor really shined through. This made these beers and this hop very enjoyable.

Sought After Hophead Hops

Photo by Markus Spiske on Unsplash

These hops may not always be hard to find online but they may cost quite a bit more than what you’re used to spending, they may only be available certain times of the year, and they may not be readily available at your local homebrew store. They are hops that all homebrewers need to try at least once to see the impact they make on their finished product.

Galaxy Hops

Galaxy hops are one of the most in-demand hops on the market today. The demand has driven the price up to anywhere between $30 and $40 per pound, one of the highest-priced hops on the market. Galaxy hops are a triple purpose hop coming in between 11% and 16% alpha acid. Galaxy hops have flavors and aromas of peach, passionfruit, pineapple, citrus, and a lovely generic tropical fruit flavor that is close to being unmatched by any other hop. Galaxy hops are best used late in the boil, post-boil, or as a dry hopping addition. Galaxy hops are a desired addition to any hop-forward beer.

Amarillo Hops

Amarillo hops are primarily used as a flavor and aroma hop. Amarillo has some uniqueness in that it’s grown in both the United States and Germany and the hops you get from each country are noticeably different from one another. They typically range from 7% – 12% alpha acid, which can be fairly high for a hop that is primarily used for floor and aroma. The higher alpha acid version of this hop are usually the ones from Germany. The American Amarillo hop will have flavor and aroma characteristics of citrus, orange, floral, and tropical fruit. The German version will have a few distinct variations to include a tropical / fruit punch version, a lemon/citrus version, and a stone fruit version. These are one of my favorite hops to use at the end of the boil, in the whirlpool, or hop stand when making a hop-forward beer. Give them a try, I assure you they won’t disappoint.

Sorachi Ace Hops

Sorachi Ace hops maintain their popularity and demand due to their unique flavor characteristics even though they are grown in limited quantities. Sorachi Ace hops contribute flavors and aromas of lemon, dill, and citrus. Their lemon and dill flavors are the most noticeable, with the lemon being in the forefront. They range in alpha acid from 11% – 16% and have been used successfully as a bittering, flavor, and aroma hop. Some commercial breweries have even used Sorachi Ace as the only hop in certain beers that they’ve brewed. I’ve used them in IPAs, American Pale Ales, American Barleywines, and Saisons. This is definitely a hop you must try once either on its own or combined with another fruit-forward or citrus-forward hop.


Brewing Water Basics – Putting it All Together

Tuesday, February 13th, 2018

brewing water minerals

We’ve covered some of the basics of water chemistry in the last two articles, and now we are ready to put it all together.

The first step is to start with chlorine-free water of suitable quality for brewing and reducing the alkalinity if needed.

Once you have an understanding of targeting an optimum range for the mash pH and taken steps to use non-alkaline water for sparging, the next step is to consider using brewing salts in the water to further enhance the flavor of your beer.

Just as in cooking certain spices go well with certain foods, certain brewing salts can enhance certain styles of beers. Looking back at the list of our brewing salts, we can see what each of them brings to the table:

Calcium (in Gypsum and Calcium Chloride): Calcium is the primary ion that determines hardness of the water. It helps with lowering the pH during mashing, helps with precipitations of proteins in the boil (hot break), enhances yeast flocculation, and assists in preventing beerstone. Many lagers are made with very low levels of calcium, so it is not required but can be helpful in the amounts 50-100 ppm.

Magnesium (Epsom Salt or MgSO4): Also responsible for providing hardness to the water, it can provide a sour/bitter flavor to the beer in amounts of 30 ppm or more. It has a laxative effect in much larger amounts. Malt provides all of the magnesium required for yeast health, so it is not required as an addition unless adding sulfate in the presence of a high calcium level (using epsom salts, or MgSO4).

Sulfate: Sulfate is the ion that is used to accentuate hop bitterness by enhancing the dryness of the finish. Additions are normally avoided in continental lagers or only used in small amounts, often 30 ppm or less, and in most ales the ideal amount is 30-70 ppm. For highly hopped beers, the desired sulfate level may be much higher: 150-300 ppm for IPAs or west coast APAs. That will make the finish seem more crisp and dry. If using 150 ppm or higher, the chloride level should be under 50 ppm to avoid a minerally finish to the beer.

Chloride: Chloride accentuates a fullness or “roundness” of flavor in the beer, enhancing the malt sweetness. It is generally used in the 40-100 ppm range in many beers, but in the New England IPA style, the chloride is often over 100 ppm, up to 150 ppm.

Sodium (Non-iodized table salt or NaCl): Sodium rounds out the malt flavors, and can be used in modest amounts (under 150 ppm). A higher concentration can make the beer taste salty, and having a high sodium combined with a high sulfate level can create a harsh bitterness. It is generally recognized that keeping the sodium at 0-60 is a safe bet, and using brewing water sourced from a water softener is to be avoided.

Baking Soda (NaHCO3 or sodium bicarbonate): This is used if alkalinity is needed to raise mash PH, and also provides sodium.

Many of us can remember the older guy at the bar with a tap beer in front of him using a salt shaker to sprinkle salt in his beer. Looking at the list, we can see that the table salt consists of NaCl- both sodium and chloride. The sodium rounds out the malt flavor, and the chloride accentuates the fullness of the malt sweetness. We can do the same thing via these salt additions to the mash and/or preboiled wort.

Determining Brewing Water Additions

brewers friend brewing water calc
Check out the Brewer’s Friend Brewing Water Calculator

Adding the salts is done in very small amounts, typically grams. While it can be converted to other measurements (a teaspoon of calcium chloride is close to 5 grams), the amounts are generally very small so a scale that weighs to grams and/or tenths of a gram is very helpful. While it is easiest to just add a teaspoon or a half of a teaspoon of something to the mashing water, it’s best to look at a brewing spreadsheet showing the additions so you can see the results of adding the salts. There are also nomographs available and of course an enterprising brewer can calculate it by hand. The amounts are usually expressed in parts per million (PPM) and the spreadsheets themselves have guidelines on how much to add to avoid overuse. The salts are typically added to the mash, but can be added to the boil kettle in some cases. Make sure to never add baking soda or other alkalinity to the sparging water. In the rare case where you need to raise the mash pH, add the baking soda to the mash.

When deciding what additions are suitable for each batch of beer, consider what you want to bring out in the beer’s flavor. Also, keep in mind that “less is more” generally applies, until you know what you like in a certain beer recipe or style. For example, if you are making an American IPA you may want to use some gypsum (calcium sulfate), as the sulfate will help to provide a dry finish and a crisper mouthfeel to enhance the hops bittering. While some brewers will go up to 300 ppm of sulfate in these beer styles, you may want to start smaller at first to avoid perceptions of harshness. Since the easiest way to add sulfate to the beer is via gypsum which also adds calcium, this is commonly done. The other way to add sulfate is via magnesium sulfate (epsom salt), but it’s important to keep the magnesium level below about 30 ppm to avoid a bitter/sour flavor. Some brewers eschew the addition of epsom salts totally, feeling that the gypsum does the job without any issue.

For a beginning profile for something like an American pale ale or IPA, a modest addition of gypsum is may give great results. As an example, using 7 gallons of RO to begin the brewday for a 5 gallon batch, adding 7 grams of gypsum will provide 63 ppm of calcium and 148 ppm of sulfate. Looking at the list above, you can see that it is in a desirable range for both calcium and sulfate for a hoppy beer. Using a brewing spreadsheet, you can see that using this amount of gypsum in the mash is also likely to give an optimum mash pH as well, depending on the grainbill, so this is a great place to start. After the brew is finished and taste testing, a decision can be made for next time. You can even add a touch of gypsum to the glass, to see if you prefer the beer with more sulfate for next time. Starting with less than the maximum recommended generally gives satisfaction to the brewer.

For beers that have a lovely malt flavor, calcium chloride is a common addition. Looking at the list again, you can see that calcium chloride will provide calcium to the mash as well as the chloride. Since chloride enhances the fullness or “roundness” of malt flavor, and gives a perception of sweetness to the malt, adding it to a beer recipe can bring the flavor to the next level. If you’re making an Octoberfest or brown ale, adding some calcium chloride would be a great move. Adding 3 grams to a 5 gallon batch of brown ale maybe be just the ticket to making a very good beer great.

For brewing lagers, especially European style lagers, less sulfate is desirable and often it is completely left out. It wouldn’t be unusual to brew a German pilsner without any additions to RO water at all, so keep in mind that adding brewing salts is not necessary and is a matter of the style of the beer as well as the brewer’s taste.

For a good basic “all purpose” water profile to start, consider something like this:

Calcium: 75 ppm
Magnesium: 10 ppm (more or less, but under 25 ppm)
Sodium: 0-50 ppm
Sulfate: 50-70
Chloride 50-70
Mash pH of 5.3-5.5

There are a couple of cautions when adding brewing salts to your water adjustments. Many brewers will refer to the sulfate:chloride ratio because that’s been discussed in older brewing texts. The theory is that keeping a ratio of sulfate to chloride will make a beer more “hoppy” or more “malty”- but this is not so. When discussing a ratio, remember that 80 ppm of sulfate and 40 ppm of chloride is a 2:1 ratio, and according to a brewing water spreadsheet available online (EZ Water) the text says “may enhance bitterness”. That’s great- but 800 ppm sulfate and 400 ppm of chloride is ALSO a 2:1 ratio- and it also says “may enhance bitterness”. Common sense dictates that one beer will be far different than the other, while the ratio is exactly the same. The first should be just fine, although not with a particularly dry finish, but the second will be “minerally” and undrinkable. When you are cooking and add too much salt to your spaghetti sauce ,you cannot erase that by adding more pepper. When brewing, you also can’t “erase” too much gypsum by adding more calcium chloride. Instead of targeting a sulfate:chloride ratio, look at the actual numbers in ppm and the recommended limits of each ion, and make the decision based on that.

Another pitfall is to be so consumed with the numbers of the ions is to forget that the mash pH is the most important aspect of delving into water chemistry. An appropriate mash pH will provide the most benefit to your beer, while the flavor ions are the “seasonings” in your beer. Starting with a good recipe and using good water and targeting an optimum mash pH will make a very good beer. Tweaking the recipe by adding some gypsum and calcium chloride (as examples) may take that very good beer to very, very good or even excellent beer. To compare brewing to cooking again, adding the perfect amount of salt and pepper to your spaghetti sauce can make your very good sauce something memorable, and adding a bit of rosemary may make it exceptional. So it goes with brewing- starting with a great base and adding your brewing salts in the right amounts can take it to the next level. Adding too much is more of a danger than too little, so be aware of that in your additions as you start adjusting your water.

Entire books have been written about brewing water and water chemistry for brewers, as the subject is complex. Further reading is highly recommended. Some good sources are listed below:

Here are a few links to additional reading, as well as some of the sources of this article:
https://howtobrew.com/book/section-3/understanding-the-mash-ph/reading-a-water-report
John Palmer, How To Brew
https://sites.google.com/site/brunwater/water-knowledge
Martin Brungard, Bru’nwater
https://braukaiser.com/wiki/index.php?title=Beer_color,_alkalinity_and_mash_pH
Kai Troester
https://www.brewersfriend.com/mash-chemistry-and-brewing-water-calculator/
Brewer’s Friend, water calculator

Water- A Comprehensive Book for Brewers John Palmer & Colin Kaminsky


Brewing Water Basics Part 2

Sunday, November 19th, 2017

brewing water basics alkalinity

This article is a continuation of a three-part series. Check out part one here.

You may have heard that you have “hard” water, or “soft” water. Hardness in water is mostly due to the calcium and magnesium ions in the water. A low concentration of these is said to provide soft water, while high concentrations produce hard water. The hardness of your water varies regionally. In the Midwest the water tends to be hard, while in places like southern California and other coastal areas, the water tends to be soft. Neither type of water is inherently poorly suited to brewing, and both can be used successfully. In most cases, moderately hard water is ideal due to the need or desire for some calcium in the brewing water.

The hardness of your water is balanced by the alkalinity of the water. This is in the form of bicarbonates. Alkaline water is high in bicarbonates. In your water report, you should see “hardness as CaC03” in parts per million (ppm) or “alkalinity as CaC03” in ppm. The key to using your water is to determine its alkalinity and taking steps to provide the proper amount so that you can obtain a proper mash pH. The make up of the sparge water is important as well, and this should be kept in mind.

The pH of your starting water does not impact the mash pH as much as you would think. That is due to the buffering capacity of the water (the alkalinity) and the more acidic grains. Once the water is combined with the grains in your recipe, the mash pH will be determined. The mash pH is the important part of this—it determines many of the qualities of your beer (flavor, color, clarity) and is a factor in enzyme activity. These enzymes are what go to work to convert the starch in the malted grain to fermentable sugars. Providing a mash pH of 5.2-5.7 favors their activity, although the enzymes will work outside of that range. Narrowing the target mash pH to 5.3-5.5 will help to optimize the enzymes, and also enhance flavor. A higher pH will increase harshness in the finished beer, extracting more tannins and also increase the isomerization of hop oils so that the beer can come across as rough or coarse. To be clear, when we are discussing the pH during mashing, we are talking about the readings taken at room temperature. To check the pH, a very small sample (even a shot glass size) can be taken from the mash, cooled in an ice/water bath, and then checked when the sample is at 68-75 degrees. PH readings vary from mash temperatures to room temperatures, and any pH readings are always provided at room temperature. This also will help preserve the life of the probe on the pH meter. A good quality pH meter can be found for +/- $100 or so, and is highly recommended. There are pH strips available in the 5-6 pH range, but their accuracy is questionable and they can be very hard to read, especially with dark wort.

Sparge water should be acidified to have a pH of less than 6, to avoid tannin extraction as the gravity of the wort drops. Alternatively, water with minimal alkalinity can be used such as distilled or reverse osmosis water for this. Sparging with alkaline water can cause some harsh flavors as well as a puckering dryness in the finish.

Dealing with Alkalinity:

For some of us, the biggest challenge is dealing with high alkalinity in the water. For a moderate amount of alkalinity, some acid in the mash and sparge water can be an easy fix. For those with high alkalinity, there are options such as pre-boiling the water and racking off of the precipitate, lime softening, dilution with distilled water, or even installing a reverse osmosis system in your home to deal with this. Our article will discuss adding some acids to our brewing water to optimize the mash pH and sparge water alkalinity, and diluting your own water with distilled or reverse osmosis water.

For further information on reducing alkalinity with lime, please see: https://braukaiser.com/wiki/index.php?title=Alkalinity_reduction_with_slaked_lime . The technique is easy, but far beyond the scope of this article. This works well for brewers with good but alkaline water, and is worth considering as it is inexpensive.

One of the easiest ways to estimate your probable mash pH is with a brewing water spreadsheet. There are several available online, and in some brewing software programs you may already have.  We recommend the Advanced Water Calculator at Brewer’s Friend here:  https://www.brewersfriend.com/?p=2959&preview=true .  Each calculator may differ some in the algorithms they use, but most are fairly similar. With your water report in hand (or using the default for reverse osmosis water if that is your supply), you enter the values into the software where indicated, along with the volume of water you are starting with and the batch size. The volume of water you may start with may be a gallon or two more than your batch size, due to boil off and grain absorption and there will be a box for this. Using the recipe input portion, you add the amounts of the grains you are using in the current batch. The spreadsheets will then give you a projected estimate of the mash pH.  The water calculator in Brewer’s Friend is easy to use with a very small learning curve.

You will notice that almost all of the mash pH projections for light to amber colored beers will be higher than desired. That is where the acid additions come in. The acids of choice for brewers are lactic acid and phosphoric acid in the US and often CRS in the UK. There are others available, but many (such as citric acid) may have an undesirable flavor impact so lactic acid and phosphoric acid are more widely used in the US. Lactic acid may have a flavor impact in large amounts as well, so if you have more than moderately alkaline water you may wish to use phosphoric acid which is more flavor neutral. Make sure to look at the strength of your acid. Lactic acid usually comes in 88%, while phosphoric acid can be 10% or 88%. The spreadsheets have a place to add the acid of choice (with the strength) on them, and then recalculate the mash pH of your batch.

Since the grains have a natural acid content, when mixed with water the pH of the mash will naturally drop. Dark roasted grains are more acidic than pale grains, and will drive the mash pH lower without adding acid to the mash. Unless you are brewing a very dark beer, many water supplies will require some acid however, and pale beers most of all. Using a soft water with low alkalinity is a key to success with beers such as pilsners because of this, while brewing a stout will require some alkalinity to balance the acidic grains. That is where the spreadsheets can be helpful, so that the acid content of the grains is estimated and then balanced against the alkalinity of the water. Target a mash pH of 5.2-5.7, ideally 5.3-5.5, for best results. Don’t forget that readings are always done at room temperature. It is highly recommended to do a test mash- that is, a very small batch of the recipe you are using, with the same volume of water per ounce of grain, and to check the pH. You will then know how the entire volume will react, and can make adjustments to your acid additions as needed when making the batch.

In rare cases, it may be necessary to add alkalinity to your water. For example, if you are starting with soft water with low alkalinity, the darker grains used in a porter or stout may drive your pH too low. Unless you have naturally high sodium in your water, baking soda is the addition of choice. Calcium carbonate (chalk) has been used routinely in brewing, but because of its limited solubility, it does not dissolve well in the mash unless extraneous measures are taken, and should be avoided.

heating brewing sparge water brewing water chemistry

It is also important to treat the sparge water if you have alkaline water. If you adjust your sparge water to have a pH of 5.5-6, and avoid any additions of alkalinity like baking soda, you should be all set. Many brewers will choose to sparge with 100% distilled or reverse osmosis (RO) water in lieu of acidifying the water, and that works well. To acidify the sparging water, lactic acid or phosphoric acid can be used. Often, this is very little acid especially if you are using 88% lactic acid so a pipette or dropper is very helpful. To avoid flavor impacts, using phosphoric acid is recommended if more than 5 ml of lactic acid in 5 gallons of water is required for the necessary pH drop. If you do not have a pH meter, the sparge water tool in the brewing water spreadsheets can be used.

To check the mash pH, a small sample of the mash can be taken out and cooled to room temperature (72-75 degrees or so) and the reading taken with a freshly calibrated pH meter. A small shot glass cooled in an ice batch works well for this. The pH of the mash does change as the mash proceeds, however slight, and so the first reading should be taken within about 10 minutes of mashing in. If it is fairly close to the projected desired pH, it should be left and notes taken for next time as chasing pH can be futile if adding acid and then alkalinity to try to hit the target. If the mash pH is wildly off from the projected pH, a new reading should be taken before attempting any fix.

For many brewers, mash pH adjustments may seem overwhelming, at least at first, so further reading is recommended. This article attempts to break water chemistry down into the simplest methods and this is a very complex subject.

If all of this still seems very difficult at first, one of the quick and easy ways to get a likely acceptable mash pH is to start with 100% reverse osmosis (RO) water and add a bit of lactic acid or acidulated malt to it. That will be appropriate for most light/pale beers, although not as precise as targeting a mash pH with the water additions and grist in the recipe. Using RO water for the mash and sparging water, and using acidulated malt in the amount of 1-2% of the grainbill (usually 2-4 ounces in an 11 pound 5 gallon batch) will often get you quite close. For a stout or other beer recipe with 1# of dark roasted grain like roasted barley or black malt, leave out the acidulated malt.  This should result in an acceptable end product without worry.

We will talk about more specific steps to make water chemistry easier for you in the next article of our series.


Brewing Water Basics – Part 1

Sunday, November 19th, 2017

brewing water, mash water

For many brewers, water chemistry is treated as the last frontier of homebrewing. Oftentimes, it is ignored or at least not something homebrewers want to think about. The old adage “if your water tastes good, it’s fine to brew with” may be repeated, and believed. The brewer may work on refining recipes and take great pains to provide fermentation temperature control, but ignore the water used in brewing.

This is a mistake because the largest component of beer is the water. Managing the pH of the mash and the flavor contributions of the water can take a good beer to a great beer. While it’s true that poor tasting water will make poor tasting beer, the inverse is not always true. Great tasting water out of the tap may not be well suited to brewing. Additions to the water by the water supply company such as chlorine, or the more stable form called chloramine, keep your water supply safe for drinking but chlorine can negatively impact the flavor of the beer. In some areas, the water out of the tap may be high in bicarbonate or iron which can also negatively impact your beer. If you wish to not delve into water chemistry at all, it is advisable to use reverse osmosis water from the water dispensers at grocery stores or distilled water as it would be a blank canvas to start with. Even so, better beer can be made with paying attention to a few water additions and mash pH that will be discussed in this article series.

Where to Start With Brewing Water

Getting a water report from your water company, if using municipal water, is a great place to start. They should have all of the information available, but you may not get all of the information you need from them at first. They are required to test the water for safety, and will report contaminants and pesticides, but will not always give you the components that brewers are looking for in a water report. You can ask brewers around you about the water, but often the easiest way to get a report on what you need is by ordering a household minerals test from a testing company. If you have a well, this is likely the only way to get a report. One of the dangers will dabbling with brewing water is to add items per a recipe without knowing what you are starting with, so the report is crucial before beginning. A popular company is Ward Labs, but there are others out there. A basic test should run under $35 for what you need. You will require sodium, calcium, magnesium, sulfate, chloride, bicarbonate, and total alkalinity.

It’s also important to find out if your water company uses chlorine or chloramines for disinfection of the water. In order to use any water for brewing, this is a steadfast rule: the water must be chlorine free. Chlorine will off-gas and/or boil off, but chloramine is a more stable form of chlorine and will not easily boil off. It can be removed via campden tablets (potassium metabisulfite) easily. One tablet crushed and dissolved into 20 gallons of water and stirred well will remove chloramine (and chlorine) in most cases. Removing the chlorine, or purchasing reverse osmosis or distilled water should be the first step in dealing with water.

Understanding Minerals

brewing water mineral additions

The results from your water test will give you the ion concentrations in parts per million (ppm) or mg/l. These minerals are important for brewing water, because they can affect the suitability for use in brewing and have a flavor impact.

If you have iron in your water (look for discoloration in plumbing such as rust spots), it is generally poorly suited for brewing as it is detectable in very small amounts in the finished beer as an unpleasant metallic or even blood-like flavor. Iron should be under 0.1 ppm in the water. If you have sulfide flavors and aromas in your raw water (rotten egg-like smell), it will not be suitable for brewing. If you have some sediment, a filter will often help. Just be sure to send the water after filtering for testing if that is what you plan to use.

The major mineral ions will we be working with are as follows:

Calcium: Calcium is the primary ion that determines hardness of the water. It helps with lowering the pH during mashing, facilitates precipitations of proteins in the boil (hot break), enhances yeast flocculation, and assists in preventing beerstone. Many lagers are made with very low levels of calcium, so it is not required but can be helpful in the amounts 50-100 ppm.

Magnesium: Also responsible for providing hardness to the water, magnesium can provide a sour/bitter flavor to the beer in amounts of 30 ppm or more. It has a laxative effect in much larger amounts. Malt provides all of the magnesium required for yeast health, so it is not required as an addition unless adding sulfate in the presence of a high calcium level (using epsom salts, or MgSO4).

Sulfate: Sulfate is the ion that is used to accentuate hop bitterness by enhancing the dryness of the finish. Additions are normally avoided in continental lagers or only used in small amounts, often 30 ppm or less. In most ales the ideal amount is 30-70 ppm. For highly hopped beers, the desired sulfate level may be much higher: 150-300 ppm for IPAs or west coast APAs. That amount will make the finish seem more crisp and dry. If using 150 ppm or higher, the chloride level should be under 50 ppm to avoid a “minerally” finish to the beer.

Chloride: Chloride accentuates a fullness or “roundness” of flavor in the beer, enhancing the malt sweetness. It is generally used in the 40-100 ppm range in many beers, but in the New England IPA style, the chloride is often over 100 ppm, up to 150 ppm.

Sodium: Sodium rounds out the malt flavors, and can be used in modest amounts (under 150 ppm). A higher concentration can make the beer taste salty, and having a high sodium combined with a high sulfate level can create a harsh bitterness. It is generally recognized that keeping the sodium at 0-60 is a safe bet. Using brewing water sourced from a water softener is to be avoided.

Bicarbonate: Bicarbonate plays a huge role in water chemistry for brewing. It raises the pH of the mash, so should be kept under 50 ppm for pale/light colored beers. An amber colored beer could use a bicarbonate amount of up to 150 ppm (depending on the grainbill). A very dark beer with roasted grains (like a stout) could easily go up to 200 ppm or even a bit more, as more bicarbonate is needed to balance the acidity of the dark roasted malts. As such, there is no ideal range for mashing water except that what is needed to achieve an appropriate mash pH. In sparge water, low bicarbonate water is desired to avoid tannin extraction from the grain. This will be discussed at length in our next article on water and mash pH.

Brewing Salts

The common brewing salts are gypsum, calcium chloride, epsom salts, chalk, sodium chloride, and baking soda. These are available at the homebrew supply store, or can sometimes be found at your grocery market.

Gypsum  (CaSO4 or calcium sulfate) is used in brewing to bring calcium and sulfate to the water. This can reduce the mash pH, in a small amount as can calcium chloride.

Calcium chloride (Pickle crisp or CaCl2) is used to add calcium as well as chloride, and epsom salt (MgSO4 or magnesium sulfate) is used for the magnesium and sulfate contribution. Plain old non-iodized table salt (NaCl2 or sodium chloride) brings sodium and chloride to the table.

Chalk: (CaC03 or calcium carbonate) has been traditionally used to raise mash pH in cases where it may be needed, but it doesn’t dissolve well without extraneous measures and is to be avoided in general.

In those rare cases where the mash pH should be raised, baking soda (NaHCO3 or sodium bicarbonate) is most useful.

Lactic acid or phosphoric acid are the most common acids used to lower the mash pH if needed.

A helpful comparison to brewing salts may be seasoning salts in cooking. Just as making chicken soup with a great recipe and fresh ingredients can be improved with a bit of salt or some bay leaf, a great beer base can be improved with a bit of tweaking of brewing salts. Too much salt in the chicken broth can ruin the soup, however; and too much of a brewing salt can ruin the beer. Using more conservative additions with the “less is more” idea is a great way to approach adding brewing salts to your homebrewing repertoire. You don’t want a “minerally” or harsh beer in the end after all your hard work!

There are brewing spreadsheets and books available to help you decide where to target your ideal concentrations of those ions, and Brewer’s Friend has both a basic and advanced water calculator to help you reach your goals.   We have given you give a range, and it is recommended to stay at the lower end of the range until you know what you like. You can always add more next time, but you can’t take it out. One pitfall that many brewers fall into as they delve into water chemistry is finding a water profile from a historic city, and set that up as a target. That can be problematic, as it may not be what the breweries themselves actually used, as they may have preboiled the water to drop the bicarbonate, or used water from another source. If a profile seems to have very high numbers, and you’d still like to make an authentic London porter, dig a bit deeper into what the breweries in that area did with the water before brewing with it. Brewing water with less than your ideal ion targets may seem a bit bland (think of the chicken soup seasoning analogy) but won’t be undrinkable as it would be if you add far too much of a good thing.

A good way to see what the brewing salts may do to your beer is to try it out. Pour a pint of your beer, and add a dash of table salt to it to see what chloride brings out. Next time, add some gypsum, to see what that brings to the beer.

If you are just starting in water additions, you can get by with gypsum, calcium chloride, baking soda, and lactic or phosphoric acid. We will discuss using those items as we discuss mash pH and delve deeper into water chemistry in the next article.


Aspects of Brewing a Wheat Beer

Monday, October 23rd, 2017

wheat beers available

Hefeweizen, weissbier, witbier, white ale… Whatever your preference; wheat beers are abundant, effervescent, and different. They can be served with a slice of orange or lemon, with all the yeast “mit hefe” style, with raspberry syrup, or filtered crystal clear. They vary in color from the light witbier to copper-brown versions of weizenbock. They can smell and taste of: bananas, clove, coriander, bitter orange, and even bubblegum. These refreshing, mostly session strength ales are usually associated with summertime sunshine. However, there are a couple of higher ABV styles that would pair well with a cold evening by the fire.

Wheat Beer Grain Bills

The typical wheat contribution to the grain bill can be as high as 70%, with rare exceptions like grodziskie (an oak smoked wheat beer) making up 100% of the grist.

Wheat beers nearly went extinct in the 1500’s due to the Reinheitsgebot, the German beer purity law. The Reinheitsgebot stated that only barley, water, and hops could be used as ingredients to produce beer and thus prohibited breweries from using wheat, or other grains such as rye. According to a Brew Your Own article from 1999 the original purpose of the law is somewhat debatable. Certainly it was a consumer protection law to ensure people were in fact getting beer when they went to the local watering hole, but some sources claim it was meant to prevent a shortage of bread. Further down the rabbit hole of conspiracy is the idea that the pale white beers were only brewed by, and for, the nobles and clergy and not for the common man, who was left drinking the dark swill of the lower class. The law was later amended to include yeast, after its discovery.

Wheat beers have become somewhat of an American spring and summertime tradition. They often were considered to be the jumping off point for those interested in expanding their palates to include more than mass produced lagers but lately it seems like that is more the space of the mass produced IPA . Be that as it may, for those of us who live in the permanent summertime of California, we still enjoy a nice crisp, refreshing wheat beer in the sun year round. If big beer had any sense they would take a hint from Corona and show Shock Top or Blue Moon being happily consumed on beach volleyball courts by freakishly tall men and women, at high noon.

Styles of Wheat Beer

As long as we are on the subject of Belgian Wit and American summers let us take a look at Allagash White:

allagash white wheat beer

According to the BJCP (Beer Judge Certification Program), the standard guidelines for homebrew beer styles, Allagash White, along with Hoegaarden Wit, are prime examples of the wit style. Belgian Wits are generally brewed with 50% unmalted wheat and a light base malt like pilsner or 2 row pale. They can include oats to add to the haze and body. Noble hops are used to add a light bitterness, but nothing too noticeable, or overwhelming. Allagash White includes the traditional spice addition of coriander seed, which is the seed of cilantro that smells strikingly similar to Trix cereal. Allagash also uses the traditional curacao orange peel, which adds to that zesty zing in the aroma and flavor. I tried putting an orange slice to my pour and it was totally unnecessary. It added nothing to the beer and was ultimately just an obstacle in the drinking process. The beer is delicious on its own. Light, refreshing, nicely carbonated, and extremely flavorful.

I did a side by side with the macro produced Shock Top and it was comparable to watching a cover band at the local dive bar trying to fiddle their way through a Led Zeppelin song. On paper they are the same. Belgian style beers brewed with coriander and orange peel, but the difference between the two is painful. My suggestion, as far as adding an orange for garnish in the Shock Top, is to disregard the beer, and eat the orange. Also, for anyone learning about off flavors, the Shock Top tasted like cardboard. Paper and cardboard are aromas and flavors commonly associated with oxidized beer. If you have a buddy that insists on drinking this farce of a Belgian Wit I suggest you sneak some Allagash White into his/her cooler at the next outing. They will thank you later.

Have you tried the Hefe?

weinstephaner wheat beer

For the Hefeweizen (pronounced hay-fuh-vy-tsen) I chose the ultra-approachable Weihenstephaner Hefe Weissbier. According to them they are “the World’s oldest brewery” and the beer was brewed in accordance to “the purity law of 1516” which is slightly confusing considering the purity law clearly stipulated that barley was the only acceptable grain to brew with in 1516. This is how conspiracy theories get started. Give me a couple hours of online research and I’ll blow this whole Reinheitsgebot scam wide open! Further adding to the confusion, Randy Mosher in Tasting Beer stated that “Weis, Weiss, and Weisse all mean ‘white’ in German and have long been used to describe the pale, hazy beers containing wheat…” and “Weizen means ‘wheat’ in German and refers to the Bavarian or suddeutsch form of weissbier.” Even further: “hefe indicates Weissbier with yeast…” There is also a filtered version known as Kristalweizen…

The Weihenstephaner Hefe Weissbier, however, is very good. I never realized there was such a striking difference between the Belgian Wit style and German Hefeweizen. I always assumed they were the more or less the same, but different in small ways, like English Pale ale and American Pale Ale. I was wrong. The hefeweizen is much less aggressive in its flavor and brewed with 50%-70% wheat. It is softer and seemingly more rounded. The 4-vinyl guaiacol which is responsible for the clove like aroma and flavor in the yeast is in the forefront while the beer also hits notes of banana with a hint of bubblegum on the nose and taste. There is little to no bitterness or hop presence and it is extremely drinkable.

American Wheat

widmer american wheat

American wheat is one of those styles of beer that will forever be burned into my brain as uncool for reasons I don’t remember, but I don’t care, as I like it. I have vivid memories of my first times drinking these non-lager beers, after turning 21, of course. While going out to dinner with my mom, or my dad, I was quietly exploring beer menus and learning about the life I would lead after 40oz. malt liquor stopped being the norm. This was before IPAs became a staple offering at most establishments and back when hefeweizen just meant beer served with a lemon or an orange added on the rim. My memories include copious consumption of Widmer Hefe and Pyramid Hefeweizen. Since Widmer Hefe holds a space in my heart I opted to try it again to make sure it was still worthy. Upon revisiting it, the beer seemed dulled down, non-threatening, and different than I had remembered. It smelled like a hefeweizen, minus the yeast aroma, which is basically all the aroma of a hefeweizen. I went to their website to research if the recipe had changed or if my memories were better than the truth. Then as I entered my date of birth, and accessed the site, I saw a picture of the Widmer Hefe with a lemon garnishing the glass. That’s when I realized what I was missing. Having no lemons I opted for the trusty orange. I could have gone back to the store, but I had already had a tough enough time finding the Shock Top for this tasting. None of my go to stores carry it! I spend all this time seeking out small breweries and then when I need the macro stuff I can’t find it, go figure. Needless to say the orange brought the Widmer Hefe right back to where it was when I killed an oversized pitcher of it, at a burger shack, with my future wife, my mom, and my step-dad.

This is one, of many, reasons American beer has had a bad rap for so many years. It is the dumbest dumbed down version of a true hefeweizen. The yeast is a clean ale yeast and everything about it is subdued. The BJCP states that the use of American hops and more hop character, in general, is desirable. Call me crazy, but with all these American hops floating around in our IPAs, there must not be much left for our American wheats, because even at 15-30 IBU’s they are gentle and lightly bitter.

And now for something a little different.

wheat beers

Dunkel weissbier is a dark German wheat beer that maintains the yeasty banana and clove flavor other German wheat beers while also having a toasted bread or caramel flavor from the use of darker Vienna and Munich malts. Traditionally a decoction mash was used. This is a process in which a portion of the mash is removed and then brought to a boil and then added back into the main mash to bring the mash temperature to different rests. Decoction mashing aids in the darker caramel flavors associated with caramelized sugars and the maillard reaction, but this is a method that is generally no longer used in commercial breweries. Low on bitterness and hop aroma, the Erdinger Dunkel is like a dark Hefeweizen with some additional bready and caramel aspects. Malty yet dry, it is a nice change of pace that is sure to please novice beer drinkers and nerds alike.

Hefeweizen on steroids

weizenbock wheat beer

Weizenbock is an obscure style that doesn’t come up in conversation too much. It is a sleeper and I’m sure once American craft breweries discover it they will be brewing it for their yearly holiday beer. It is similar to a hefeweizen, but stronger, bigger, and, some would say, better. It is like banana bread in a glass and can come in light or dark versions. The extra malt usage adds to the higher ABV of anywhere from 6.5%-9.0% it has even more of that banana and clove flavor. Dark versions will utilize Vienna and/or Munich malt and can have more dark fruit character like plums, prunes, or raisins, and even a light chocolatey, but not roasted, flavor. I opted for the light version brewed by Weihenstephaner called Vitus. This is a good winter warmer for anyone looking to break from the traditional imperial stout or barley wine. I imagine it going great with some chocolate dessert by a roaring fire while the snow falls. Unfortunately, living in Los Angeles, I may never get to test my theory. I have, however, had an imperial stout on a cool 80 degree evening, so there’s that.

There are a few other beer styles to consider that use wheat as a fair portion of their grain bill

The classic Berliner Weisse, from none other than Berlin, is a low ABV sour that dates back to the 16th century. It is often served with raspberry syrup or with woodruff syrup to round out the mouth puckering tartness. The Berliner Weisse uses as little as 25% wheat in the grain bill, but at around 3.0% ABV. that is more than enough. During fermentation lactobacillus bacteria is introduced to create the tart, distinct sourness. It is an extremely low hopped beer in the single digit IBU range, which is evident in the lack of bitterness and hop aroma. These beers are around, but they are nowhere near as popular as they were at their peak. They are meant to be consumed young. Even with the recent interest in sour beers, some travel and effort may still be necessary on your part to find a prime example of a Berliner Weisse.

Lambic is spontaneously fermented wheat style that originated in Brussels region of Belgium. The beer utilizes hops that are 2-3 years old and an open overnight cooldown that exposes the wort to all the microorganisms that will do the hard work of fermenting, and souring the beer. Once cooled and exposed the wort is transferred into wooden fermenting vessels such as barrels where more wild yeast and bacteria are living and eager to feast on the fresh wort. They will remain in the vessels for at least one year and sometimes for several. Word on the street is one must travel to Brussels, specifically Brouwerij Cantillon, to try them.

After a few years in barrels older Lambic is blended with younger Lambic to create Gueuze. Which is bottled and then carbonated unlike the base beers, which are served with no carbonation. These highly sought after blends are still going strong in breweries such as Cantillon and can be found, in rare instances, on strong (read: STRONG) beer menus and at well curated bottle shops.

Fruit Lambic is another variation. Coming in varieties such as: kriek (cherry), frambroise (raspberry), or pomme (apple) as well as others, the fruit lambic is traditionally made by adding fruit to the year old Lambic and essentially creating a secondary fermentation which is then bottled and carbonated. Once again, look to Bouwerij Cantillon in Brussels for prime examples of this style. If you know someone who knows someone maybe you can secure a bottle for a rainy day, or better yet, a hot summer swelter.


Wheat Malt in All Grain Brewing

Sunday, October 16th, 2011

Wheat malt takes extra preparation in brewing since it is smaller in size than standard malts. The first time I ran wheat malt through my grain mill, it was frustrating to discover the gap was set too wide for the wheat malt only! The other grains were being crushed perfectly. I ended up trying a few different approaches until I was successful. My mill is not easy to adjust, so adjusting the gap only makes sense for me if I am going to do a lot of it. For crushing small amounts of wheat malt, the best approach I found is to use a blender.

wheat malt

To make this more confusing, there are several types of Wheat Malts: white wheat, read wheat, pale wheat, carawheat, chocolate wheat, etc. Rye malts are even smaller than wheat malts. Be prepared to adjust the gap on your mill when using Rye or Wheat malt, or resort to the blender.


Option 1 – Plastic bag and a hammer:

This was a lot of work but it got the job done for the most part. This is really only feasible for a half pound of wheat malt or less. The plastic bag is ruined and you need a nice smooth concrete slab to hammer against. The floor of my brew shed worked well, but this took a good 10 minutes to complete.

wheat malt crush in bag

You can still see a few whole kernels in this picture.

wheat malt crush

The bag is completely shot. Many small holes develop as part of the pulverization process.

wheat malt crushing

Option 2 – Rolling pin and plastic bag:

This is completely out. I could not get enough pressure on the kernels to break them. Gave up after a minute.

Option 3 – Adjust the gap on your mill:

Great if your mill is easy to adjust and you can reliably adjust the gap back to the correct setting for standard malts. This is only viable for me if I am doing more than a couple pounds. Next time I make a Hefe, which requires 60% Wheat Malt, this is the option I will use.

Option 4 – Mill it twice:

Some people have reported they run the wheat malt through their mill twice. In my case this did not help at all. Way too much of the wheat malt was falling through without being crushed.

Option 5 – Use a Blender:

This is the winner! The blender is a cheap-o no name brand, with a weak motor and a dull blade. In other words, a fancy blender is not needed to mill wheat malt.

wheat malt blender

My approach is to crush 1-2 cups of wheat malt at a time. Adding just a touch of water really helps. Without water the kernels tend to bounce around too much. Some of the very fine flour got stuck in the bottom of the blender. In the final image below, a few kernels are left whole, but everything underneath it has been nicely ground and is ready to go into the mash.

wheat malt mill


Notes for All Grain brewers:

A protein rest is recommended when brewing with Wheat Malt (~120F for 20 minutes), but not required. If the grain bill has more than 25% Wheat Malt, it would be a good idea to add rice hulls to help prevent a stuck mash. When Wheat Malt is mashed it globs up and looks like oatmeal.

Wheat malt is traditional used in beers like Hefeweizen, Bavarian Weisse, Wizens, where it makes up 40-60% of the grain bill. Wheat malt can also be used in extract brewing as a steeping grain. Increasing, a small percentage (3-5%) of wheat malt is added to grain bills of all types of beer to aid in head retention and body. I have been experimenting with this myself.


Hops Types Pellet Plug Leaf

Sunday, March 21st, 2010

Hops come in three different packages, pellet, plug and leaf (whole/loose leaf). The difference between pellet, plug and whole leaf hops is much more than cosmetic. Aside from looking different, these variations will affect hop utilization (to a degree), freshness, and ease of storage/use. The best hop type for you will be based on your brewing style, storage room and equipment.

Pellet Hops:

Pellet hops are hop cones which have been pulverized and then squeezed into compact little pellets. These hops are highly processed which generally leads to a slightly higher cost per ounce. Listed below are some facts about hop pellets:

  • They are no less “fresh” than whole/loose leaf hops
  • They are the easiest of the three to store as they are very compact and require less room
  • The fact that they are pulverized leads to approximately 10% better utilization over leaf hops
  • They are very effective as “dry hops” as well since the processing pulverizes the lupulin glands
  • They stay fresh longer than plug or leaf hops due to being compacted into pellets, reducing surface area, and reducing oxidation of the alpha acids
  • They settle out in the kettle and in the fermenter easily along with trub and yeast
  • Soak up less wort than plug or leaf hops
  • Cannot be strained from the wort easily, will plug strainer

hop pellets

Plug Hops:

Plug hops are nearly a hybrid of pellet and whole leaf hops, being whole leaf hops that are simply compressed into 2 oz. (typically) plugs, about the size of a wine cork. With this process you get leaf hops (not pulverized), but in a more compact state than if you simply buy loose leaf hops. Here are a few facts about plug hops:

  • They are no less “fresh” than leaf hops
  • They are much easier to store than leaf hops
  • They have only slightly higher utilization than leaf hops
  • They do not settle out in the kettle and fermenter nicely like pellet hops do
  • You will need a way to filter out these hop leaves when transferring liquids so that they do not plug tubing, siphons and dip tubes
  • They will retain freshness longer than loose leaf hops due to being compressed, thus leading to less surface area and oxidation.
  • Will soak up noticeably more wort than pellet hops
  • Can be strained from the wort easily
  • Design to fit through the neck of a carboy

Whole Leaf Hops:
Leaf hops are just that… the whole leaf, nothing else. These hops are also called loose leaf hops, as they are simply dry hop cones, not pulverized and not compressed in any way. Typically, these are cheaper to purchase than pellet or plug hops as there is less processing involved, but this is not always the case. Here are some facts about loose leaf hops:

  • They are no more “fresh“ than pellet or plug hops
  • They require much more space to store (3-4x as much)
  • They do not settle out in the kettle and fermenter nicely like pellet hops do
  • You will need a way to filter out these hop leaves when transferring liquids so that they do not plug tubing, siphons, chillers and dip tubes
  • Due to their loose structure and greater surface area, these hops are more susceptible to oxidation and degradation than plug hops, and much more so than pellet hops.
  • Will soak up noticeably more wort than pellet hops
  • Can be strained from the wort easily

hop pellets

Finally, to preserve the characteristics (alpha acids) of any hops, you should vacuum seal them in either a vacuum sealed plastic bag, or in vacuum sealed Mason jars. Once sealed, the hops should be frozen, or at the very least, stored cold. Doing so will mitigate the dangers of oxidizing the hops and keep them fresh much longer. If you do have the capability to store hops vacuum sealed and frozen, you also open up the possibility of buying them in bulk and saving 50%-75% over buying them at most local home brew stores.

hop pellets


Want no ads? Go Premium and unlock all our brewing tools!