Homebrewing for Beginners: How to Make Beer at Home
INTRODUCTION
Brewing your own beer is rewarding, and not difficult. Just a few simple steps and some attention to detail can start you on the path to homebrewing great beer.
Brewing requires boiling a liquid made from malt and water (called “wort”), adding hops and finally yeast to the cooled mixture. After the yeast ferments this wort, a process that usually takes 10-14 days, the finished beer is bottled with a precise amount of sugar for carbonation, and allowed to rest for two weeks or so. Some will start with a 1 gallon (3.79 liters) beer kit to begin, but most people will start with a 5 gallon (19L) sized batch. Please note that all volumes are given in metric and US measurements. The information here may seem a bit overwhelming at the beginning, but remember that these steps are done over several weeks.
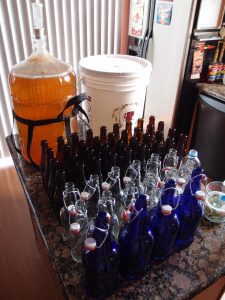
You will need some basic equipment common to all homebrewers. Generally, the best deal is to buy a “beer equipment kit”, which includes a vessel for fermenting, a vessel for bottling, some siphoning tubing, a bottle capper, a hydrometer, bottle brushes, an airlock and some cleanser and sanitizer although you can purchase these items separately as well. In addition to the beer equipment, you will need a pot that can boil approximately 2.5-3 gallons (9.5-11.5L) for a typical 5 gallon batch of beer.
EQUIPMENT LIST
- Fermentation vessel (bucket or carboy) and lid/closure

(if using a carboy, it’s recommended to mark the 5 gallon (19L) level on your carboy beforehand with tape or a marker on the outside!) - Bottling bucket with a spigot and a bottling wand
- Siphon tubing
- Auto-siphon (not strictly required but very helpful)
- Bottle capper
- Hydrometer and test jar
- Bottle brush for cleaning beer bottles
- Airlock
- 58 (12) ounce beer bottles or appropriate number of other sized bottles
- Cleaner
- Sanitizer
- Kitchen timer
- Funnel (if using a carboy)
- Wine thief or turkey baster (for taking samples)
- 3-5 gallon (11.5-19L) pot
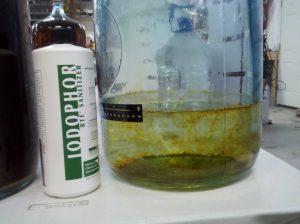
Sanitizer is on this list, because microbes including wild yeast and bacteria can ruin your beer. Your equipment should be cleaned before using it, and everything that touches the beer after it is boiled should be sanitized as well. Cleaning and sanitizing is one of the keys to making successful homebrew. There are several different types of sanitizer for brewing equipment, but most people choose a no-rinse sanitizer like Iodophor or Star-san for ease of use and dependable sanitizing.
A kitchen timer or another way to time the boil is needed. Timing your boil and/or your hops additions is an important part of the brewing process. You will also need a food safe thermometer for checking the temperature of the liquid during the brewday.
INGREDIENTS
Beer is traditionally made with four ingredients- malt, hops, water and yeast. Malt, hops and yeast will be available together as a beer ingredient kit at homebrew stores. Everything is premeasured and in the box, along with instructions, so many beginning brewers choose to start with them.
Here’s an example of a beer kit: https://www.morebeer.com/products/russian-rivers-pliny-elder-extract-beer-brewing-kit-5-gallons.html
However if you have a recipe from a site like this one from Brewer’s Friend, you can definitely buy all the ingredients separately.
- Malt Extract and Malt:
Beginning brewers often start with malt extract. Malt extract is condensed from wort, the product of combining malt and water in a specified quantity at a specific temperature. It is widely available at homebrew stores and comes in two types- liquid malt extract (LME) and dry malt extract (DME).
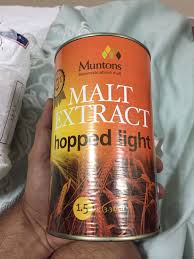
Liquid Malt Extract (LME) |
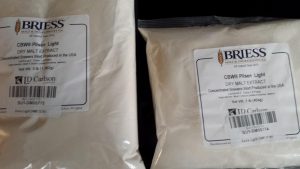
Dry Malt Extract |
Both types of extract come in many colors and varieties, and your recipe will specify which kind and type to use. In many modern recipes, some of the malt extract will be added later in the boil, or even at the end of the boil. Follow your instructions until you are comfortable with changing the timing of those additions. You may also use some malted grains to steep during the brewing process, depending on what your recipe calls for.
- Hops:
Hops give beer much of its distinctive flavor. Hops are boiled in the wort to provide bitterness, flavor, and aroma, and sometimes used after fermentation as “dry hops” for even more aroma. There are many varieties of hops from several different countries, and the kind you use will be dictated by your recipe. They usually come in 1 ounce packages. They are commonly sold as pelletized hops or whole hops.
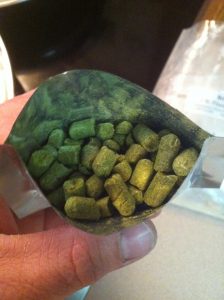
Pellet Hops
- Water
Beer is 90% water, so a good water without excess mineralization is the best water to use. New brewers will often buy spring water or distilled or reverse osmosis water to ensure the water is appropriate and chlorine-free, but tap water can be used if you have good quality tap water. If you want to use your tap water, be sure that it is chlorine free as chlorine in brewing water can cause off-flavors in the beer after fermentation.
- Yeast
Brewer’s yeast comes in both dry and liquid versions and there are hundreds of them to choose from. Your recipe will include the appropriate type to use. There is no greater advantage to dry over liquid, except for ease of use. Liquid yeast comes in more varieties, so sometimes that is the preferred choice for some recipes. Most often it is a brewer’s preference to use dry or liquid yeast for their beer.

Different Brands of Liquid and Dry Yeast
BREWING PROCESS
To begin, steep any included grains in a muslin grain bag in 2.5 gallons of water. Steep them for 20 minutes at 150-160F (65-71C) degrees, unless your instructions state otherwise.
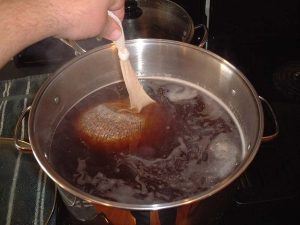
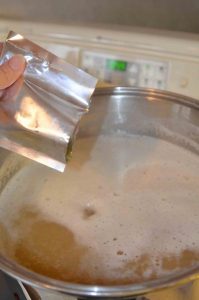
Once done, remove the grain bag, and drain the liquid over your brewing pot (a colander or strainer makes this easier). Discard the grains. Bring the liquid in the pot to a boil. Once you reach a boil, remove the pot from the heat and add the malt extract as indicated in your recipe. It’s easier to add liquid malt extract if it’s been slightly warmed in the can by placing the can in warm water first. For dry extract, it clumps when moisture hits it, so it’s often easier to put the amount of DME you need into a dry bowl first, and then add it from there to your brewpot.
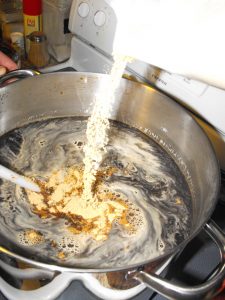
Adding Dry Malt Extract (DME) to the Pot
Add the malt extract into the hot wort, stirring well to ensure none is stuck to the bottom of your pot. Replace the brewpot on the burner again, and bring to boiling. As it gets near boiling, watch it closely as it may foam up quite a bit and threaten to boil over.
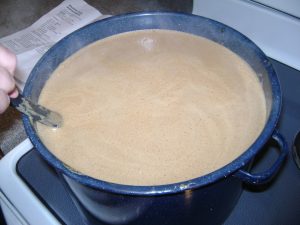
You should keep your brewpot uncovered for two reasons. One is because any volatiles that lead to off flavors can escape with the steam, and also so that you don’t have a boil over with the lid on. To prevent boil overs, make sure you have plenty of space at the top of your brewpot and stir as the foam comes up. You may need to adjust the heat down and then up to avoid a boil over. Once the wort has been boiling for a few minutes, it will stop threatening to boil over (called the ‘hot break’) and at that point the wort is ready for the first addition of hops.
Hop additions are timed from the length of time they are boiled in the wort. The first addition is usually noted in the recipe as bittering and listed as “60 minutes”. When you add that first hops addition, set your timer for 60 minutes. Thereafter, add any additional hops at the time remaining on the timer. For example, a “15 minute” addition of hops would be added with 15 minutes left on the timer, or 45 minutes after the wort as boiled. If you have hops to add at 0 minutes (also called a ‘flameout’ addition), you add them immediately after turning off the heat to your pot when the timer hits 0. Some recipes have many hop additions, while others may have only one. It depends on the style of beer you are making as some beers don’t have flavor or aroma hops in them.
Adding Hops to the Boil
FINISHING THE BOIL
After the boil is over, chill down your wort to under 80F (27C) degrees as fast as possible. Usually, this can be done in an ice bath in the sink but some brewers will buy a piece of equipment called a wort chiller that hooks up to your sink. Now that the boil is over, anything that touches your wort should be sanitized. The wort will chill more uniformly and faster if you gently stir it with a sanitized spoon, and if using a water bath for chilling, stirring the water bath also helps.
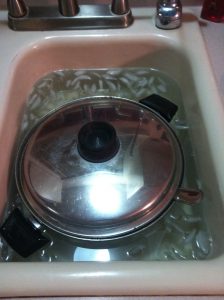
Chilling the Wort in an Ice Bath
While you are waiting for the wort to chill, mix up your chosen sanitizer according to the package directions. Using some of the liquid sanitizer, sanitize your fermenter, airlock, lid, and funnel (if using), hydrometer, and any other equipment you plan to use for the beer today. This is easiest done in a bowl for the smaller equipment. Wet all surfaces thoroughly, drain the sanitizer, and then place your sanitized equipment on a clean paper towel nearby. For a carboy or bucket, make sure to swirl the sanitizer around to cover all surfaces, and then pour back into the mixing vessel. Many sanitizers, like star-san, can be saved to reuse for your next batch or on bottling day.
After the wort reaches 80F (27C) degrees or less (check with your cleaned and sanitized thermometer), pour into your fermenter. Use a sanitized funnel to fill your carboy, or just pour into a fermentation bucket.
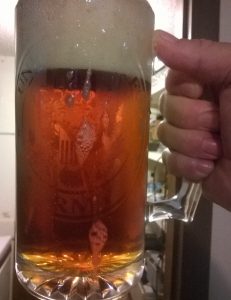
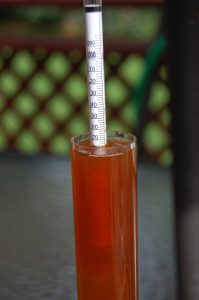
Top up to the 5 gallon (19L) mark on your fermenter with cool non-chlorinated water. Stir well or agitate to mix and bring oxygen into the wort. Check with a sanitized thermometer to ensure the wort is between 60-72F (16-22C). Once mixed, use your sanitized wine thief or a simple turkey baster to draw out a sample and place the sample in the hydrometer test jar. Float the hydrometer in your test jar, and set it on a flat surface. Gently spin the hydrometer to knock off any bubbles, and bend over to read the hydrometer at eye level. Look at the side of the hydrometer that says “specific gravity” or SG scale. Each mark on your hydrometer counts as 2 points, similar to a thermometer, and there are lines between the even numbers like 50, 60, etc. Look at the hydrometer and make a note of the reading on your instruction sheet. Discard the sample. In this case, the reading is hard to see in the photo, but it is 1.078.
Add your chosen yeast strain to the wort, using sanitized scissors to open the package. If your yeast manufacturer has specific instructions on details like stirring it in, not stirring it in, rehydrating, etc, follow those instructions. Otherwise, just add the yeast to the wort at this point.
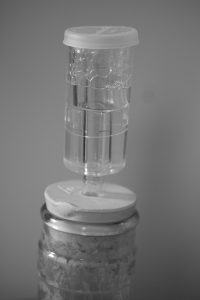
Cover your fermenter with the lid or the stopper, fill the airlock up to the line with water or sanitizer and place the airlock in the hole on the top of the closure.
Now place the fermenter in a cool dark place. Ideally, an ale will generally be fermented at 60-70F (16-21C). If you have a glass carboy and the room is not without direct sunlight or bright light, a blanket or dark towel over the fermenter will be needed to protect the fermenting beer from light. The yeast strain used is what determines the correct fermentation temperature, so check the manufacturer’s specifications for your yeast strain. All the yeast companies have nice websites with the optimum temperature for each strain, as well as other helpful information.
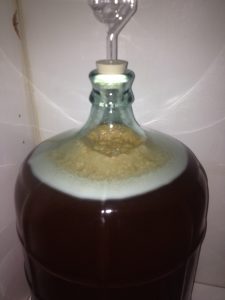
Fermentation
Approximately 12-36 hours later, you should notice some fermentation activity. Foam may rise up (called ‘krausen’) near the top of the vessel, and you may see your airlock bubble.
Yeast have first multiplied, then begin the process of fermentation. Yeast will digest the natural sugars in the wort, producing carbon dioxide and alcohol as by-products. Sometimes fermentations go fast, almost explosively so, and sometimes they go more slowly. Don’t worry about the vigorousness of this- you may rarely see any bubbling in the airlock but still have an active fermentation.
After about a week or so, fermentation may be finished or nearly so. If your recipe calls for dryhops to add to the fermenter, this is the time to do so. Then the beer will start to clear, and sediment and spent yeast will fall to the bottom of your fermenter.
Once the beer starts to clear, you can check the specific gravity to see if it’s finished and ready for bottling. This is usually around day 10-14. At that time, use a sanitized wine thief or turkey baster to take a sample as you did on brewday. Replace the lid and airlock on the vessel after you take the sample. Spin the hydrometer gently in the beer, to knock it off any bubbles that might be holding it up, and take the reading at eye level. Make a note of this specific gravity reading. To ensure fermentation is indeed finished, check the SG again at least 48 hours later. If it is the same, the beer is ready to bottle. If it has changed, take successive readings until the reading is the same at least two days in a row. Bottling before the SG reading is stable can lead to bottle bombs, so make sure fermentation is done.
Some beer styles may call for something called secondary fermentation. If so, you will siphon the beer to a new clean and sanitized carboy from above the sediment layer, called trub. This is not commonly done with most ales, but some brewers do this routinely. If your first few recipes are fairly straightforward and simple, without additions in secondary, you can skip this step.
PACKAGING YOUR BEER
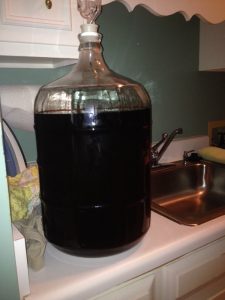
Now that the beer is finished fermenting, bottling day is here. It’s time to package your beer into bottles. First lift your fermenter to a counter or a chair in the area where you will be bottling. Doing this first allows the beer to settle again after moving it so that the sediment that is resuspended by the movement has a chance to fall to the bottom again. Some brewers will do this a few hours beforehand, or even the night before.
To carbonate the beer, a measured amount of sugar will be added to the beer. The yeast will ferment that small bit of sugar, producing carbon dioxide to carbonate the beer. This process of adding a small amount of fermentables to the beer is called “priming”, resulting in bottle conditioned beer.
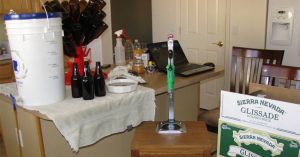
Begin by gathering all of your clean bottles, siphoning equipment, bottling bucket, bottling wand, bottle caps, and sanitize them. It’s easiest to use something called a bottling tree to hold the sanitized bottles but it is not required. Have your capper to the side and ready.
In a small pan, place 2 cups of water and bring to a boil. For carbonation, you will add a prescribed amount of sugar, either dextrose or table sugar, at this point. For a typical 5 US gallon batch (19L), you would add approximately 4 ounces (113 grams). Add this priming sugar to this boiling water, and still until it dissolves and boil for a minute or two. Allow it to cool.
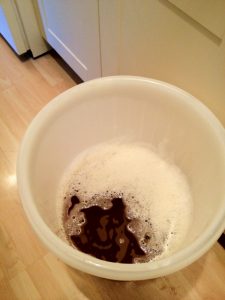
Put your bottling bucket on the floor near the fermenter, so that gravity will help with the siphon. Pour the priming solution into your bottling bucket and then siphon the beer from the fermenter into this bucket with the tubing curled around the bottom, so that the beer fills from the bottom and gently swirls in the priming solution at the bottom to mix. As you siphon, be sure to avoid the sediment on the bottom of the fermenter. Called “trub” (pronounced troob), this thick sludgy layer is a mix of spent yeast, hops debris, fats, and coagulated proteins. It’s not harmful, but you want to leave it behind as much as possible because it doesn’t taste good and looks unappealing. An inexpensive piece of equipment called an autosiphon makes siphoning much easier. Using a clamp or clip to hold the racking cane still frees your hands to hold the tubing.
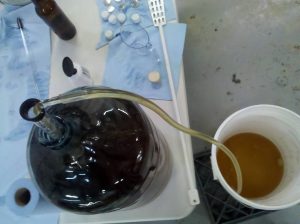
Siphoning to the bottling bucket
Siphon “quietly”, without splashing and avoid allowing oxygen into the beer as much as possible. Siphoning like this is called “racking” the beer. Bubbles in the siphon and tubing should be avoided if at all possible. Stop siphoning when you start pulling trub. It’s easiest if you start by holding the siphon just below the beer surface when you start and lower the siphon as the level of the beer lowers. Many brewers will place a phone book or a wedge under the fermenter before beginning, so that much of the trub falls to one side, and they lower the siphon body into the opposite side. Once you start sucking up some trub, stop the siphon by lifting the racking cane out of the trub, and lift the tubing out of the beer to avoid allowing air bubbles into the beer.
Lift the bottling bucket gently to a place higher than when you will be bottling. Some brewers find it’s easiest to put the bottling bucket onto a counter over the dishwasher, and place some of the bottles to fill on the dishwasher door. That contains any drips or messes, but bottling can be done on a chair or the floor as long as where you are bottling is lower than the bottling bucket. Push the sanitized bottling wand into the spigot on your bottling bucket tightly, or you could use a piece of sanitized tubing between the spigot and bottling wand if you need the extra length to bottle in a comfortable and stable location.
Fill the bottles from the bottom by pressing the bottling wand into the bottom of the bottle. Fill to the top, as when you lift the bottling wand from the bottle, you will have the perfect amount of headspace left. If you are alone, fill about 6 bottles, and then cap them with your capper. Repeat until all the bottles are filled. If you have a helper, this goes much faster and easier, so try to recruit a friend or family member by offering them a sampler of the finished beer! As the level of the beer in the bucket drops, the opening to the spigot inside may be exposed. To avoid that, and get more beer out of the bottling bucket, it’s advisable to place an item under the opposite side of the bucket, such as a phone book or wedge, so that you avoid adding air to the bottles.
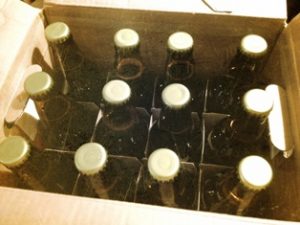
After all the bottles are capped, store them upright in a place out of direct light at room temperature. They should be carbonated in two to three weeks, so place one in the fridge 24 hours before you would like to sample one. Or, perhaps two, just in case they are really good! If they are not quite fully carbonated yet, allow them to remain at room temperature for another week and sample again. If they are carbed up sufficiently, they can be stored in the refrigerator, at cellar temperatures, or even room temperature. Just keep in mind that beer ages faster at warmer temperatures, so when the beer is at its peak, keeping it cooler is better for storage.
You’ve done it! You’ve made your first batch of beer. Enjoy a fresh homemade beer and pat yourself on the back for a job well done.