

Homebrewing Your First Extract Batch
Saturday, May 29th, 2021Beginning Brewing Series – Sweet Stout
by Jim Vondracek
Congratulations, you stand on the precipice of a remarkable hobby – brewing – one practiced by over one million homebrewers in the US! Making something by hand appeals to many of us – baking bread, building a bookshelf, growing a garden, cooking. Similarly, brewing a handmade beer brings a sense of satisfaction, combines craft and science, and in the end you get beer! For me, some of my favorite memories involve sharing a handmade beer with friends and family.
The satisfaction we get from sharing something we made, with our own hands, enhances our lives. Nothing wrong with drinking professionally-made craft beer, it’s great, but to be able to say “I made this” elevates your spirit. For many brewers, they love the satisfaction of handcrafting and sharing their beers. It makes the process of enjoying beer more intimate, more personal.
Further down this article, you will find the recipe and step-by-step explanation for brewing a Sweet Stout using malt extract. Before we get to that, let’s go over a few preliminaries.
So Many Choices!
Many years ago, I brewed my first batch of beer using malt extract. At that time, most brewers began brewing that way and I continued to brew extract batches for two or three years before switching to all-grain brewing using Denny Conn’s basic batch sparging method.
That being said, extract brewing represents only one of the possible methods to use for your first batch. Since I began brewing, the advent of brew-in-a-bag changed the landscape for new brewers significantly, by removing many of the equipment hurdles. Keep an eye out here for a future article about brew-in-a-bag for beginning brewers. I’ve helped many brewers at my club (CHAOS in Chicago) learn to brew all-grain using batch sparging. In addition, the development of electric all-in-one breweries like Grainfather, Brewzilla and Brew Easy offer new brewers another appealing (if somewhat costly) option.
This article in no way implies or argues that your first batch *should* be brewed with malt extract – today, beginning brewers have lots of options. Instead, this article intends to walk the aspiring brewer through their first batch if they choose to use a traditional entry to the hobby – extract brewing.
Extract Brewing
For many brewers, brewing their first batch with extract offers a simplified, accessible approach to get into brewing. The equipment costs can be low, so they can metaphorically stick their toe in the water and see if they like the hobby before making a more substantial commitment.
By eliminating mashing, extract brewing eliminates a significant piece of equipment and an hour or more of time from your brew day. Essentially, malt extract is the result of mashing. Using extract, you lose some flexibility in creating your wort, but that can be made up for by steeping specialty grains, a remarkably simple process that adds layers of complexity and flavors to your beer.
You may read that malt extract beers are inferior – don’t believe it. Many brewers make excellent extract beers and win medals at competitions. Focusing on sanitation and fermentation, instead of mashing, helps beginning brewers make better beer.
This Sweet Stout recipe was among the first beers I brewed, probably my third or fourth, and it won a silver medal in the stout category at a four hundred entry competition.
Why a Sweet Stout for My First Brew?
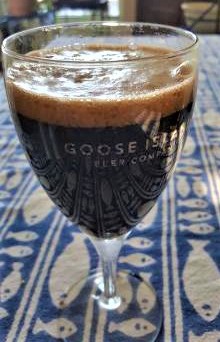
A style that is full of flavors may cover up some off-flavors that typically appear in a brewer’s first few batches – I think stouts generally are great for beginners and the sweet stout is especially good. It’s got both nice roast and chocolate, a little caramel and dark fruit, finishes off-dry and presents a medium to medium full mouthfeel.
Equipment
Many of us have a five-gallon stock pot in our kitchens, if not you’ll need to buy one (and will use it for other things, in any case, like making stocks or cooking big batches of chili). You’ll also need a whisk or spoon long enough to stir the batch, which you probably already have. A kitchen or cooking thermometer also comes in handy – using an instant read electronic thermometer or candy thermometer you already have works great.
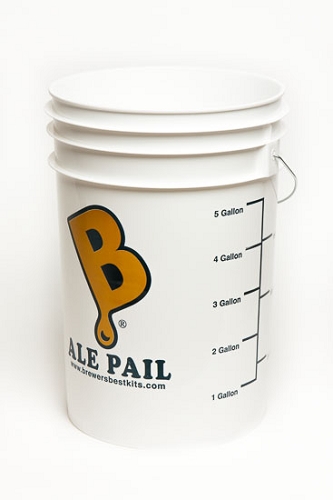
You’ll need a fermenter – most of us won’t have anything in the kitchen we can repurpose for that, so you’ll need to buy a plastic fermentation bucket, lid and airlock.
Looking ahead, when it’s time to bottle, you’ll need a bottling bucket (similar to your fermenting bucket, but with a spigot towards the bottom), an auto-siphon and plastic tubing (to get the fermented beer from your fermenter to the bottling bucket), a bottling wand and hand capper. A future article in this beginning brewing series will go through bottling step-by-step, but for now, if you want to buy everything you’ll need at once, add those bottling supplies to your list.
This list represents the bare-bones approach – you need these items, but you can buy many other helpful pieces of equipment, for example, a hydrometer.
If you have a homebrew store near you, great – go there and get what you need, plus your ingredients (listed below). If not, there are lots of excellent online homebrew stores to choose from.
Ingredients
The recipe we’re using for the Sweet Stout is here on Brewer’s Friend. When you buy your equipment, you can also pick up the ingredients you’ll need for this five-gallon batch:
- Fermentables
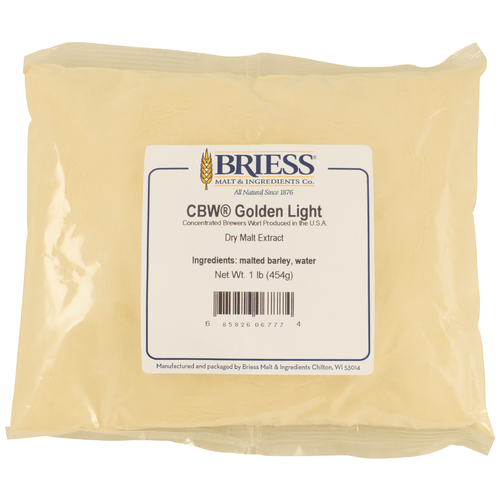
- 6 lbs Extra Light Dry Malt Extract or 7 lbs Pale Liquid Malt Extract
- 1 lb Lactose Powder (Milk Sugar)
- Steeping Grains
- 1 lb Black Patent malt (500L) (crushed)
- ¾ lb Crystal 80L (crushed)
- ½ lb Chocolate malt (200L) (crushed)
- Hops
- 1 oz East Kent Golding Hops
- Yeast
- 1 pack of Nottingham or US-O5 Yeast
- Other Items You’ll Need
- 1 muslin or grain bag
- 1 container of Star San or Iodophor sanitizer
Required Reading
You should read this thorough explanation for beginning brewers here at Brewer’s Friend. It is one of the strongest, clearest articles I’ve seen for beginners. This article compliments it, it doesn’t replace it. Go read it!
Your First Brew Day!
First, review your recipe on Brewer’s Friend here.
Plan to allocate three or so hours for your first brew day. A very important thing to remember – don’t stress out as you follow these steps, if you get something wrong, take it in stride. Likely, you didn’t ruin your batch. And if you did, well, stuff happens. Think of it like cooking – most of us don’t bake the best batch of bread ever or make an excellent roast chicken on our first attempt. Relax.
Steeping the Specialty Grains
To start with, fill your pot with three to four gallons of water and heat it on your stove to 150F to 160F. When it reaches temperature, put the black patent, crystal 80 and chocolate malt in the muslin or grain bag and securely tie it closed (see the ingredients above for exact amounts). Dunk it in the hot water, like you would a tea bag.
Once the grain is wet and starts to expand in the bag, just drop it in. Maintain the water at the temp – you may cover your pot, or occasionally add heat. Do not let it rise to 170F – it is better to keep it cooler than too hot (which may cause your beer to be tannic). Steep the grain like this for approximately 30 minutes. Using tongs, a sturdy cooking spoon, or a sieve with a handle, lift the bag of steeping grains out of the wort (liquid) and let the contents drain into the pot. Throw the bag and grains away – they’ve done their job!
Start the Boil and Add Hops
Turn the heat under the pot up and bring the wort to a boil. Watch carefully, you don’t want this to boil over. If your stove has trouble getting it up to boil, you may cover it, but when it begins to boil, remove the lid. Maintain a steady, gently rolling boil.
When your wort is boiling, toss in your hops. Let them boil for 45 minutes (without a lid)
Add Malt Extract and Lactose
After 45 minutes, add the dry malt extract and lactose. Both of these will clump up and form a cement-like substance that will burn on the bottom of your pot if you just dump them in, so don’t do that! Rather, get a large mixing bowl and scoop out some of the boiling wort, then slowly add a portion of the extract and whisk or stir like a mad man until it dissolves. Pour the liquid back into the pot and repeat as needed until you have added all the extract and lactose. You likely will have lost the boil during this procedure, bring it back up to a boil and then let it boil another 15 minutes. Turn off the heat.
Chill the Wort, Sanitize the Fermenter and Top Off
Partially fill your sink with water and ice and put the pot in the ice water to cool. You may need to replenish the ice water from time to time.
Make a batch of sanitizer (Star San or Iodophor) following the directions on the package. Sanitize the thermometer – anything that will be touching the wort at this point forward (post-boil) needs to be sanitized. Take the temperature of the wort – when it has cooled to around 80F, you’re ready for the next step.
Using the Star San or Iodophor, sanitize your fermenting bucket and pour the wort into the bucket. This recipe calls for a five gallon batch, so now top off the wort with cold water to bring the total wort in the bucket to five gallons – your fermentation bucket will have markings on the side indicating volume. Stir or rock the bucket to mix and add some oxygen to the wort.
Pitch the Yeast and Ferment
Open the yeast packet and pour in, on top of the wort. Sanitize the fermentation bucket’s lid and close it. Fill your airlock with sanitizer and insert in the lid’s grommeted hole. Stash the fermenter somewhere coolish – if you have a space that stays in the mid to low sixties, that’s perfect. If not, wherever is coolest in your home will work. Let it sit for two or three weeks. Resist the temptation to open the lid, nothing good comes from that! Amuse yourself by watching the airlock bubble for a few days, don’t fret if it takes a day or two to start!
Woohoo, You’re Making Beer!
Congratulations, you’ve completed your first brew day – well, after you’ve cleaned up the mess you made! Enjoy a beer and get ready to bottle your beer in three weeks!


2 Responses to “Homebrewing Your First Extract Batch”
very nice,i am going to do this recipe
By richard on Jun 29, 2021
Let us know how it goes, Richard!
By Jim Vondracek on Jul 2, 2021