


Instrument Calibration for Maximum Brewing Awesomeness
Sunday, December 19th, 2010I am about to brew several batches of beer – whoot! In the spirit of science, and the interests of quality, I decided to recalibrate my equipment since it had been awhile. Besides, I broke my hydrometer and had to buy a new one, so I have no idea where I’m at with it. Beyond this basic checkup the brew kit doesn’t need much of a tune up this year besides tightening screws, checking seals on taps, and replacing old hoses. Here we come 2011 brewing season.
Brewing has aspects of chemistry involved. Scientific method is part of the process if you really want to master it. In order to replicate a batch accurate numbers must be measured and recorded. Please check out our brewday sheets for ready made record keeping.
Thermometer Calibration:
If you are an all grain brewer, it is essential to have at least one accurate thermometer and preferably a backup for use during the mash. I have a digital thermometer, and I keep an old school glass thermometer as a backup.
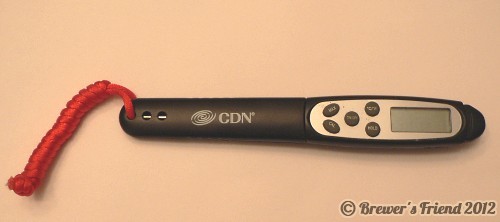
It turned out my digital thermometer was off by about ten degrees! This would have caused some very off mashes had I not addressed this.
My procedure was to check the temperature reading at freezing (32F / 0C), and at boiling (212F / 100C). I also compared the reading of my digital thermometer to my standard mercury thermometer. The procedure was simple, take some crushed ice and mix it in a glass of water. Let the ice start to melt. The solution will be at freezing temperature and should read within a tenth of a degree of 32F / 0C. Then I boiled a small pot of water and made sure it read 212F / 100C. I noticed some screwy readings, so I dug into the instructions on my digital unit and recalibrated it. This brought the numbers back to where they should be.
Hydrometer Calibration:
I would expect hydrometers to be factory calibrated, but of the two new ones I bought, one was +0.002. The other one was spot on and I’m using that now, but I have a mental note that my backup hydrometer needs an adjustment.
Keep in mind a hydrometer reading needs to be temperature corrected to 59F / 15C, or 68F / 20C depending on your hydrometer.
We have a calculator to handle that for you here.
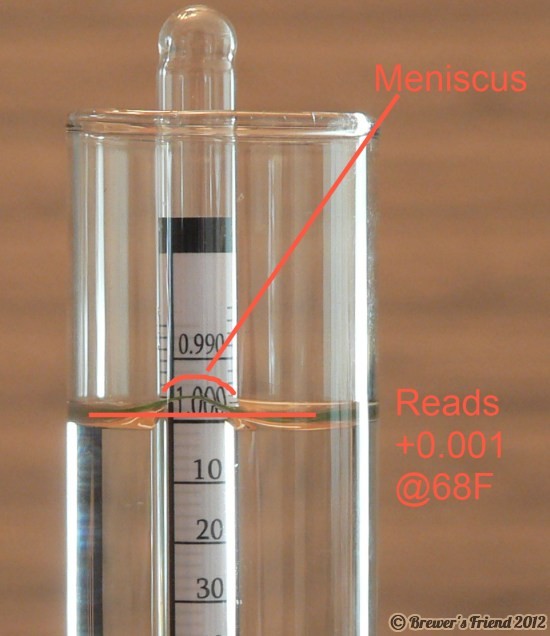
The first thing to do is measure the hydrometer reading in plain water. Mine is calibrated to 59F. That means it should be 1.000 @59F. Also make sure to read the hydrometer correctly. The meniscus is the curve that forms due to surface tension from the suspended hydrometer. Usually the water line is what you want to read and not the meniscus, but it varies by model. The instructions will say how to read the hydrometer. The image below illustrates a 1.001 reading @ 68F and points out the meniscus which should be ignored in my case. After temperature correction, this hydrometer would read 1.002 in water. +0.002 is quite a bit (4% off for an average batch).
The second thing to do is prepare a sugar solution that will give you a reading of 1.046. One pound of table sugar in one gallon of water has a specific gravity of 1.046. My graduated cylinder (the tube the sample goes in) holds about 6 ounces, and 5 ounces is a good amount for taking a reading. Here’s where the math comes in. Figure out how many ounces you want to use for you reading, then use the equation below to figure out how much sugar to add in ounces.
Formula for 1.046 solution:
{ounces of water for hydrometer sample} * 0.125 = {ounces of table sugar needed}
I needed 5 ounces of water, and 5 * 0.125 = 0.625. I measured out 0.625 ounces of sugar and dissolved that into solution.
Derivation:
1 pound of sugar in 1 gallon of water has a specific gravity of 1.046, thus:
16 ounces of sugar in 128 ounces of water has a specific gravity of 1.046.
16 / 128 = 0.125, so we need 0.125 ounces of sugar per ounce of water for a 1.046 solution.

My good hydrometer read 1.045, and the screwy one read 1.047, but after temperature correction (68F to 59F), the numbers came out to 1.046 and 1.048. Now I’m ready to brew like a scientist!


7 Responses to “Instrument Calibration for Maximum Brewing Awesomeness”
Thanks for this. It made me calibrate my hydrometer and find out it’s reading 1.002 high. Suddenly a lot of readings in past batches that weren’t making sense are making sense.
By Hopwise on Dec 20, 2010
Hopwise, that’s great news, glad we could help! It’s amazing how important these little details are.
By Larry on Dec 21, 2010
Tip: gently spinning the hydrometer sometimes helps to get bubbles unstuck.
By Larry on Jan 8, 2011
Stupid question: If your glass thermometer is a backup to your digital, is it because the glass is more reliable? If so, why use the digital at all?
More along the same lines: If you have a thermometer and another as a backup, and they differ, how do you know which is correct? I’m not trying to be clever, I’m just wondering…
By Jeff on Jan 29, 2011
Hi Jeff,
I just happen to own the glass thermometer. The digital is easier to handle (don’t have to worry about dropping it as much because of the plastic casing). When I calibrated the glass thermometer it was accurate. It all comes down to calibration and ease of use.
By Larry on Jan 30, 2011